Three sections of your application form repeat: the addresses you ask for, the people you ask for, and the trade references you ask for. Each has its own settings in the form builder that decide how many the applicant sees, how many they must fill in, what each one is called, and which boxes inside them are required. This article covers those three sections and what your choices look like to the applicant.
Before you start
- You need to be an account admin. The builder only opens for admins.
- Read "Build your application form with the form builder" first if the builder is new to you. Every change here stays in your draft until you click Publish.
- These sections are already on your form. The builder lets you tune them, and move them between steps, but there is normally no need to add or remove them.
Open a section's settings
- Click your profile picture in the top right corner, then click Credit Application Configuration, then Open the builder.
- Click the step that holds the section in the list on the left, then click the section on the canvas. The whole section is outlined in green and its settings open on the right.
- Change what you need, click Save at the bottom of the panel, and publish when you are ready.
References
- Open the references section. On most forms it is on a step called Company References.
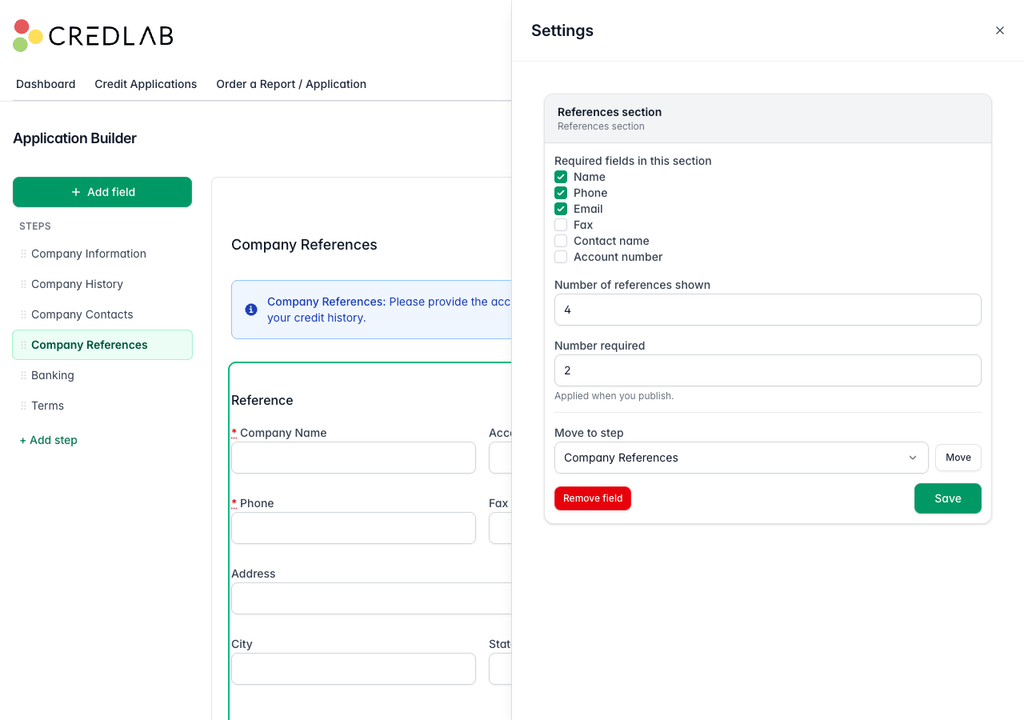
The builder with the references section selected, showing six required field tick boxes, Number of references shown set to 4, and Number required set to 2.
- Required fields in this section are the boxes inside each reference the applicant must fill in: company name, phone, email, fax, contact name and account number. Tick the ones you cannot work a file without.
- Number of references shown is how many reference blocks the form offers, from one to ten.
- Number required is how many of those blocks must be completed. The required boxes are only enforced on the first that many references. If you show four and require two, an applicant can leave the third and fourth empty.
The reference blocks are what Credlab uses to send trade requests once the application is in. See "How trade references work".
Locations
- Open the locations section. On most forms it is on the first step, under the company details.
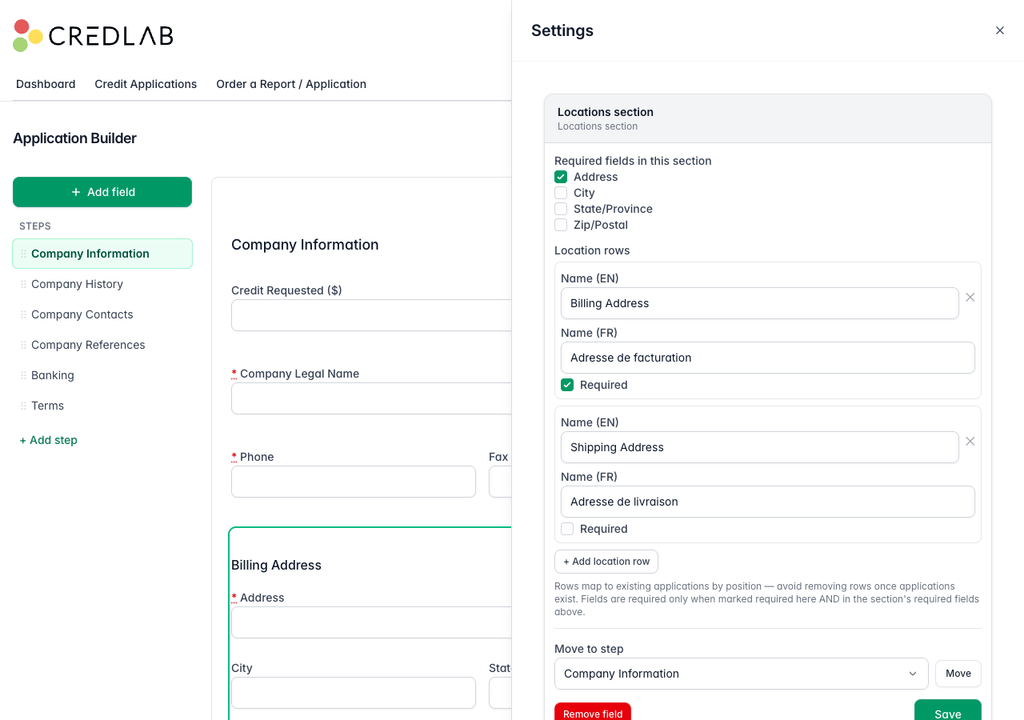
The builder with the locations section selected, showing four required field tick boxes and two location rows, Billing Address marked required and Shipping Address not.
- Required fields in this section are the boxes inside each address: address, city, state or province, and zip or postal code.
- Location rows are the addresses you ask for, each with a name in English and, if your form offers French, in French. Tick Required on a row and the boxes you ticked above become required in that row. Leave it off and the row is optional, however the boxes above are set.
- Click + Add location row for another address, or the cross beside a row to remove it.
Contacts
- Open the contacts section. On most forms it is on a step called Company Contacts.
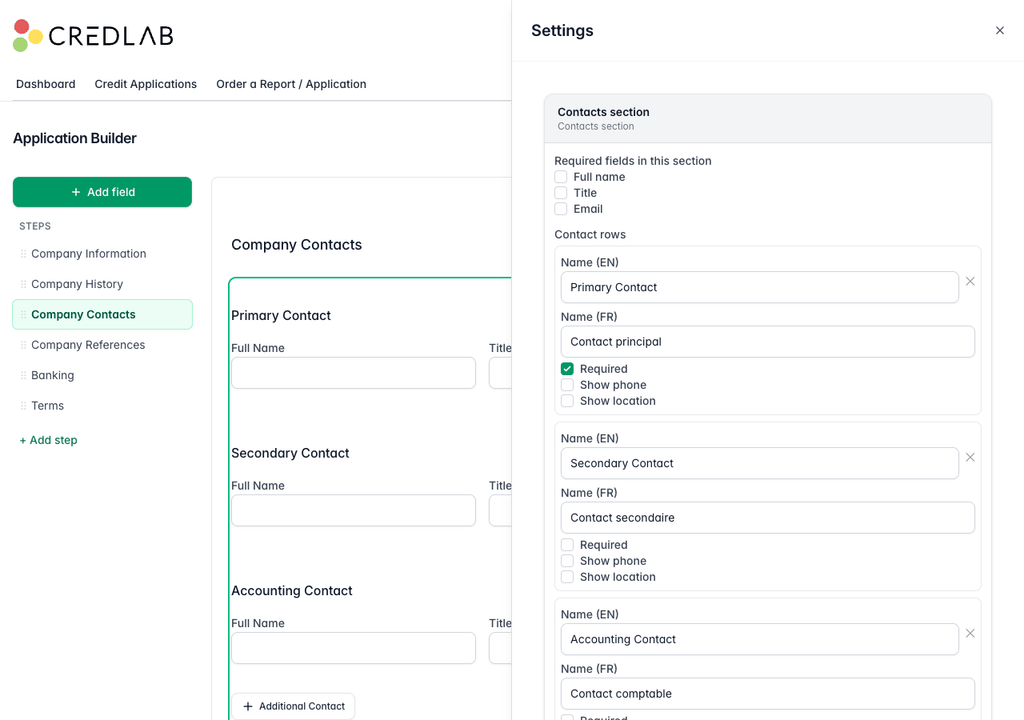
The builder with the contacts section selected, showing three required field tick boxes and contact rows named Primary Contact, Secondary Contact and Accounting Contact, each with Required, Show phone and Show location boxes.
- Required fields in this section are the boxes inside each contact: full name, title and email.
- Contact rows are the people you ask for, each with a name in English and, if your form offers French, in French. Required works the same way as on a location row.
- Show phone adds a phone box to that contact. Show location adds a set of address boxes to that contact, for a person who works somewhere other than the company's own address.
- Click + Add contact row for another person, or the cross beside a row to remove it.
Whatever rows you set up, the applicant can also click Additional Contact at the bottom of the step to add people of their own.
What the applicant sees
- Click Preview in the top bar and scroll to the contacts step. Each row you set up is a block headed with the row's name, holding the boxes you chose.
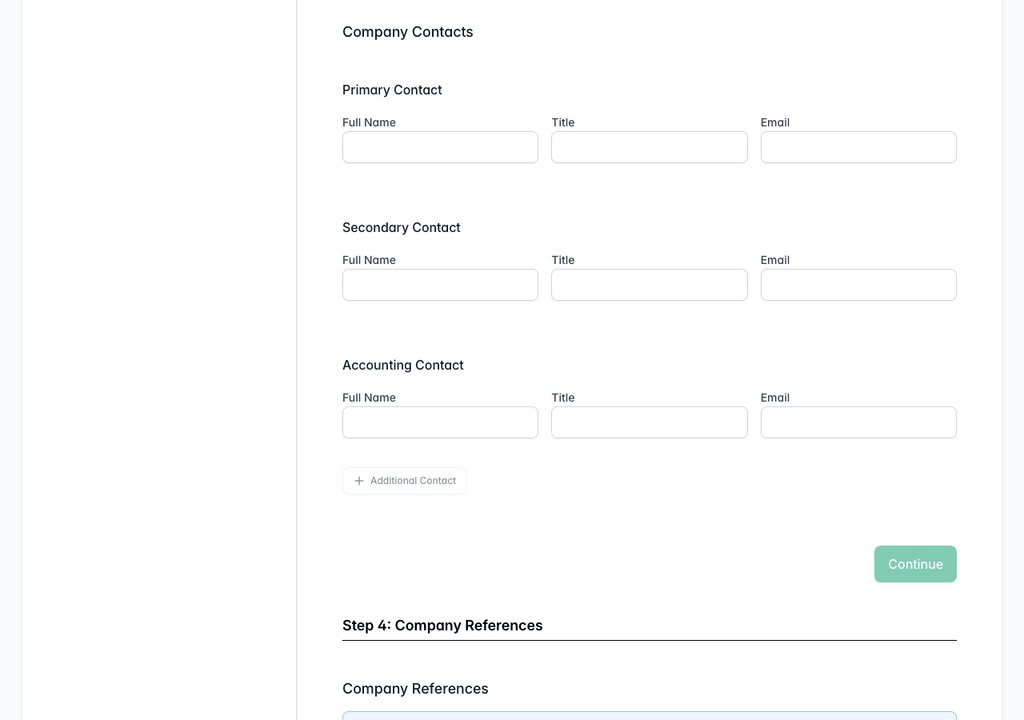
The Company Contacts step in the form preview, with Primary, Secondary and Accounting Contact blocks each holding full name, title and email, and an Additional Contact button. - Scroll on to the references step. The reference blocks repeat as many times as you set, with the required boxes marked on the first ones.
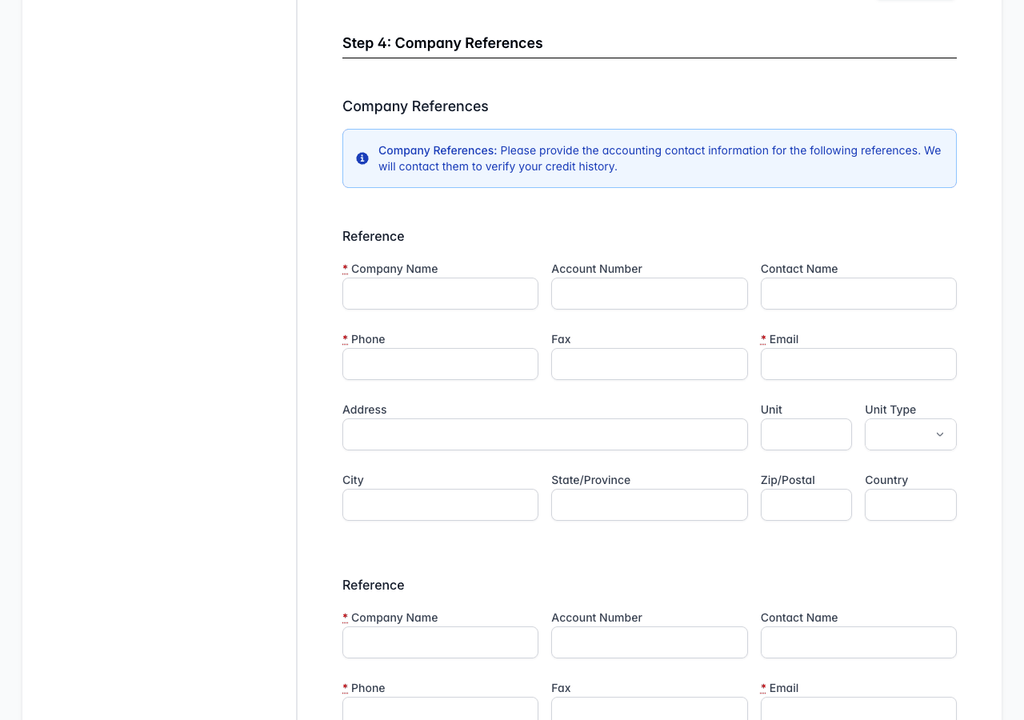
The Company References step in the form preview, showing the introduction text and two reference blocks with company name, phone and email marked required.
Tips & notes
- Do not remove a row once you have applications. Rows match the answers on submitted applications by position, first row to first row, so deleting the first contact row shifts every later contact's answers up a place on old applications. Rename a row instead, or add new rows at the end.
- Required twice. On locations and contacts, a box is only required when it is ticked under Required fields in this section and the row is marked Required. On references, it is the tick plus the row being within Number required.
- Fewer references, more applications. Applicants abandon long forms. Two required references with two more optional is a common balance.
- The introduction text above the references is a separate field. The blue note that says what you will do with the references is an information field placed above the section, and it is edited on its own in the builder. See "Build your application form with the form builder".
- Check the printable copy. The blank application you download from Application Settings prints every row and every reference block, so you can see the whole shape of what you are asking for on one page.
Related articles
- Build your application form with the form builder
- Set up your terms, signatures and personal guarantee
- How trade references work
- Add conditional rules to your form