The last step of your application form is where the applicant reads your terms and conditions, agrees to them, and signs. Everything about that step lives in one place in the form builder: the wording of the terms, how many people sign, whether you ask for a personal guarantee, the sentence beside the agreement box, and which kinds of business are allowed to decline. This article covers each of those settings and shows what the applicant sees as a result.
Before you start
- You need to be an account admin. The builder only opens for admins.
- The terms live in the builder, not on the Application Settings page. Read "Build your application form with the form builder" first if you have not used the builder before, in particular the part about publishing: nothing you change here reaches applicants until you click Publish.
- Have the wording of your terms, and of your personal guarantee if you use one, ready to paste. The editor takes formatted text, so a document from your legal team can go in as it is.
Open the terms settings
- Click your profile picture in the top right corner, then click Credit Application Configuration, then Open the builder.
- Click Terms in the steps list on the left, then click the terms block on the canvas. The whole block is outlined in green and its settings open on the right.
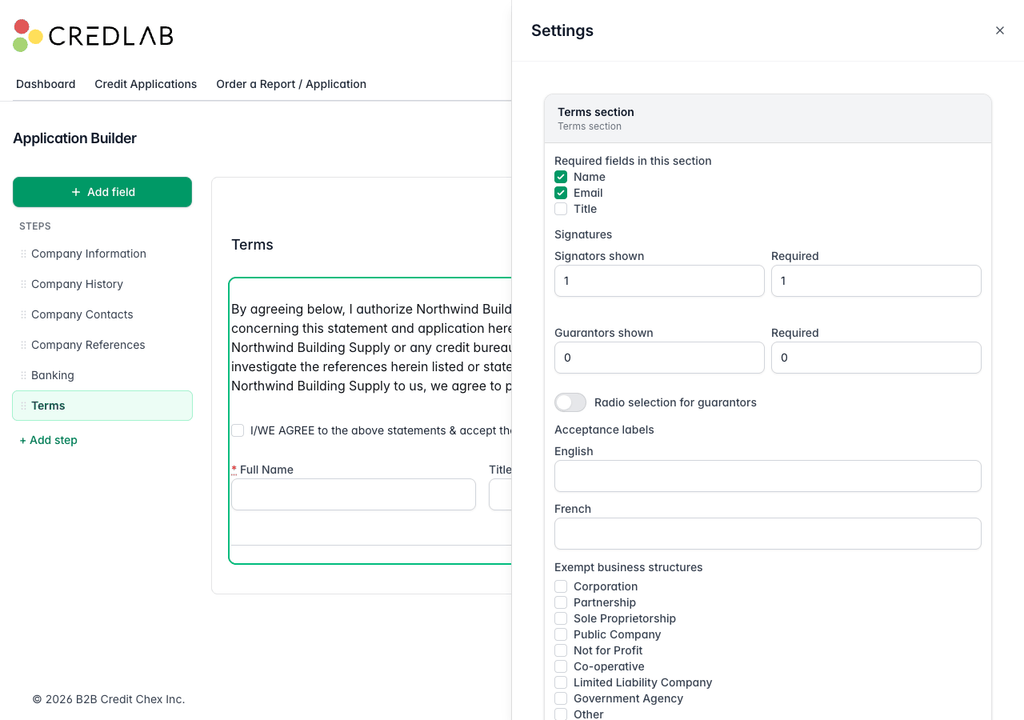
The builder on the Terms step with the terms block selected and the settings panel showing required fields, signature counts, acceptance labels, and exempt business structures. - Change what you need, click Save at the bottom of the panel, and publish when you are ready.
Choose how many people sign
Each signer fills in a name, a title and an email address under the terms. Required fields in this section decides which of those three every signer has to fill in.
- Signators shown is how many signer rows the form offers, from one to ten.
- Required beside it is how many of those rows must be completed before the application can be sent. It can be anything from none up to the number shown.
The first signer is who Credlab emails the signing link to when your form asks for an online signature. See "Send the application for e-signature".
Ask for a personal guarantee
A personal guarantee is a second agreement, with its own wording, that one or more individuals sign in their own name.
- Guarantors shown is how many guarantor rows appear under the guarantee wording. Leave it at zero and the guarantee section is not shown at all.
- Required beside it is how many guarantors must be filled in.
- Radio selection for guarantors changes how the applicant accepts. Off, the guarantee has a single tick box, the same as the terms. On, it has two choices, agree or do not agree, under a Personal Guaranty Agreement heading, so an applicant can say no without leaving the box empty. Choosing do not agree greys out the guarantor rows.
Change the sentence beside the agreement box
Acceptance label is the sentence next to the tick box under the terms. Leave it empty and Credlab uses "I/WE AGREE to the above statements & accept the terms and conditions". Type your own to replace it, in English and, if your form offers French, in French.
Let some kinds of business decline
Exempt business structures lists the business structures your form asks for: corporation, partnership, sole proprietorship and so on. Tick one and an applicant who chose that structure earlier in the form sees two choices under the terms, agree or do not agree, instead of a single required tick box, and can send the application either way. Everybody else has to agree before the application will send.
Edit the wording
- Scroll to Text at the bottom of the panel. There is a link for the terms and conditions and one for the personal guarantee, each in English and, when your form offers French, in French.
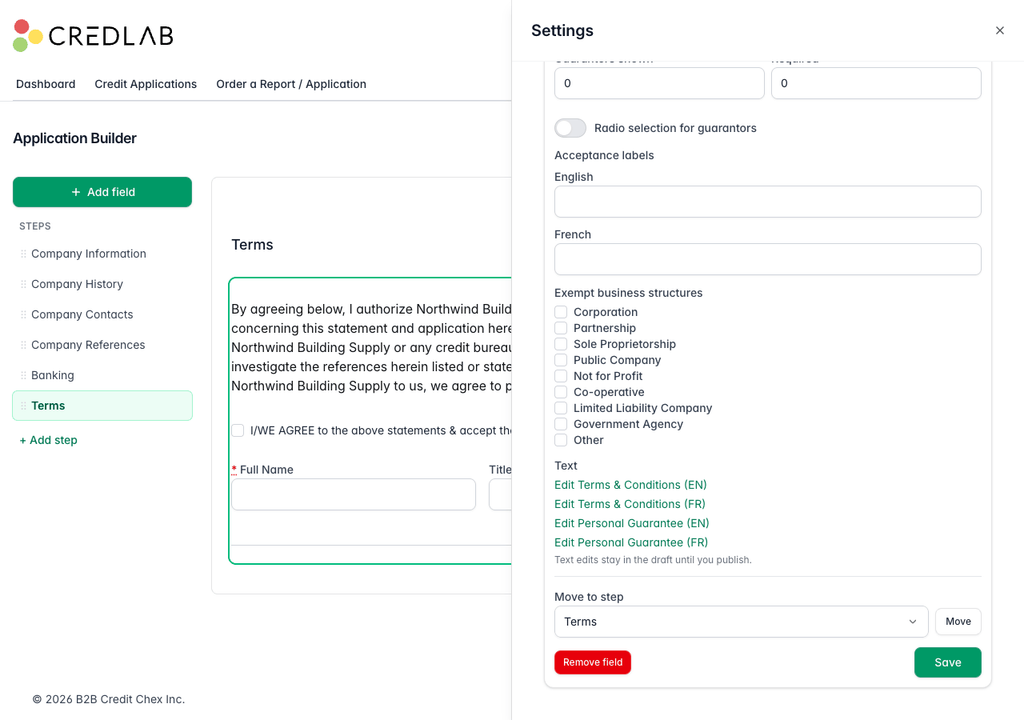
The bottom of the terms settings panel showing the Text links for editing the terms and conditions and the personal guarantee in English and French. - Click Edit Terms & Conditions (EN). The wording opens in an editor window.
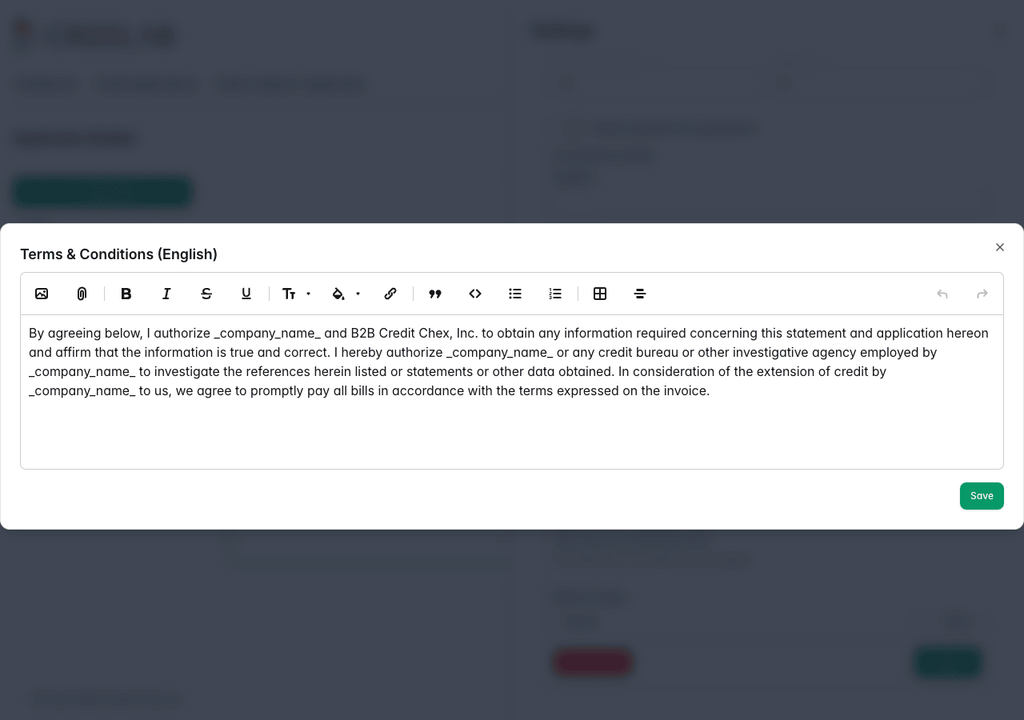
The Terms and Conditions editor open over the builder, showing the terms wording with the company name placeholder and a Save button. - Change the wording and click Save. The editor closes and you are back on the Terms step.
Wherever the wording says _company_name_, Credlab writes in your account name when the form is shown, so the same text works if your company is ever renamed. Text edits stay in the draft until you publish, like everything else in the builder.
What the applicant sees
- Click Preview in the top bar and scroll to the Terms step. The terms come first, then the agreement box, then the signer rows, then the personal guarantee and guarantor rows if you use them.
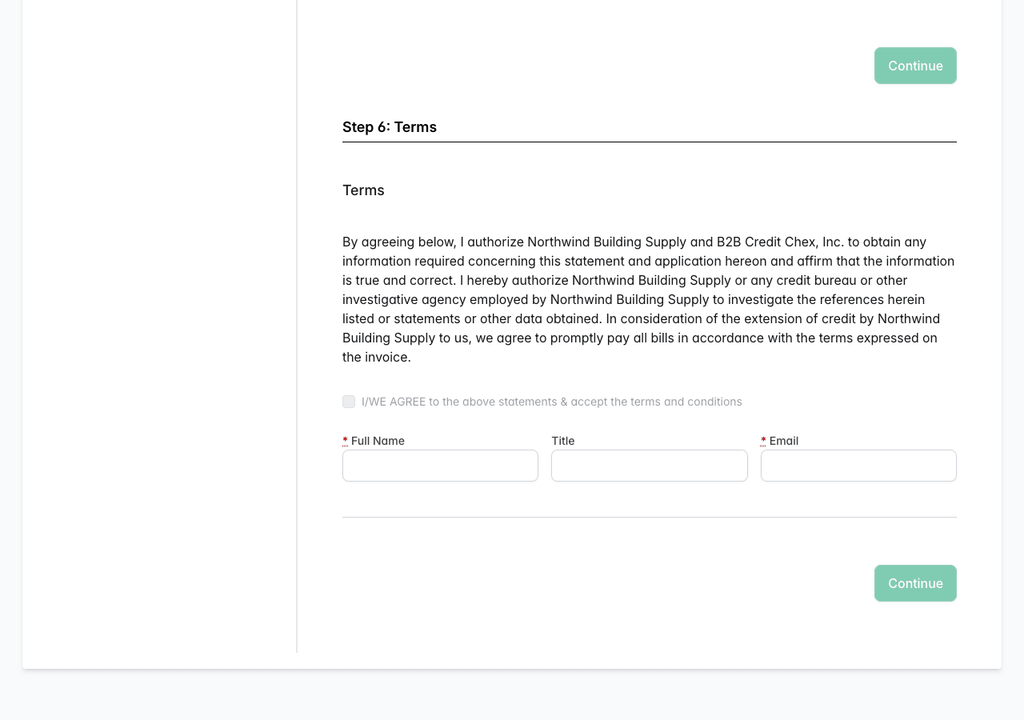
The Terms step in the form preview, with the terms wording above the agreement tick box and the signer's full name, title and email boxes.
Tips & notes
- Publish, then check. Open your application link in a private browser window after publishing and read the Terms step as an applicant would. The preview shows the draft, not what applicants currently see.
- Applications already submitted keep their terms. Each application's saved copy and PDF carry the wording the applicant agreed to, so changing the text does not change what anybody already accepted.
- Required means required for the online signature too. A signer whose email address is optional and empty cannot be sent a signing link, so keep email required if your form asks for online signatures.
- The French wording is separate. Turning on the French option does not translate anything. Paste the French terms into the French editor, or turn the option off until you have them. See "Set your application link and submission options".
- Section required fields and row required fields are separate settings on the contact and location sections, but not here: a signer's fields are simply required for the first however many rows you set.
Related articles
- Build your application form with the form builder
- Send the application for e-signature
- Set up references, locations and contacts on your form
- Set your application link and submission options