The words across the top of your application form, and the address printed beside your logo, come from one section of Application Settings. The title is the heading applicants see on every step, the subtitle is the line under it, and the application address is your company address as it appears on the form and on the printed copy. This article covers changing all three, in English and in French, and shows where each one ends up.
Before you start
- You need to be an account admin. Credit Application Configuration only appears in the menu for admins.
- If your form offers French, the French boxes are shown beside the English ones and need filling in too. The French option is switched on in the next section down. See "Set your application link and submission options".
- The field labels, section names and terms are not here. They are in the form builder. See "Build your application form with the form builder".
Open the section
- Click your profile picture in the top right corner, then click Credit Application Configuration.
- Click the Application Wording row to open it.
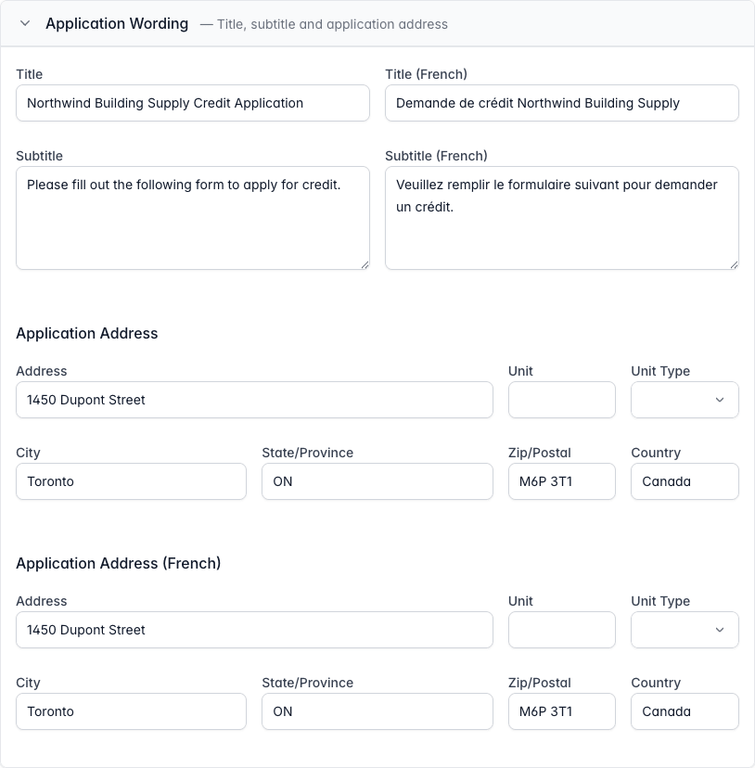
The Application Wording section open, showing Title and Subtitle in English and French above an Application Address and a French Application Address.
Change the title and subtitle
- Type the heading you want into Title. Most companies use their name followed by "Credit Application".
- Type the line under it into Subtitle. It is a plain text box, so a sentence or two telling applicants what the form is for, or how long it takes, is about right.
- If your form offers French, fill in Title (French) and Subtitle (French) as well.
- Scroll to the bottom of the page and click Save Configuration.
Change the application address
Application Address is the address applicants see for your company. It starts as the address on your account, but it is a separate copy, so you can show a head office here while your account keeps a branch address, or the other way round.
- Fill in Address, City, State/Province, Zip/Postal and Country, with Unit and Unit Type if you have them.
- Fill in Application Address (French) if your form offers French. It is usually the same address, and the box is there so the province and country can be written the French way.
- Click Save Configuration.
Where the wording appears
- On the application form, the title and subtitle sit across the top of every step, and the address sits under your logo in the left hand column.
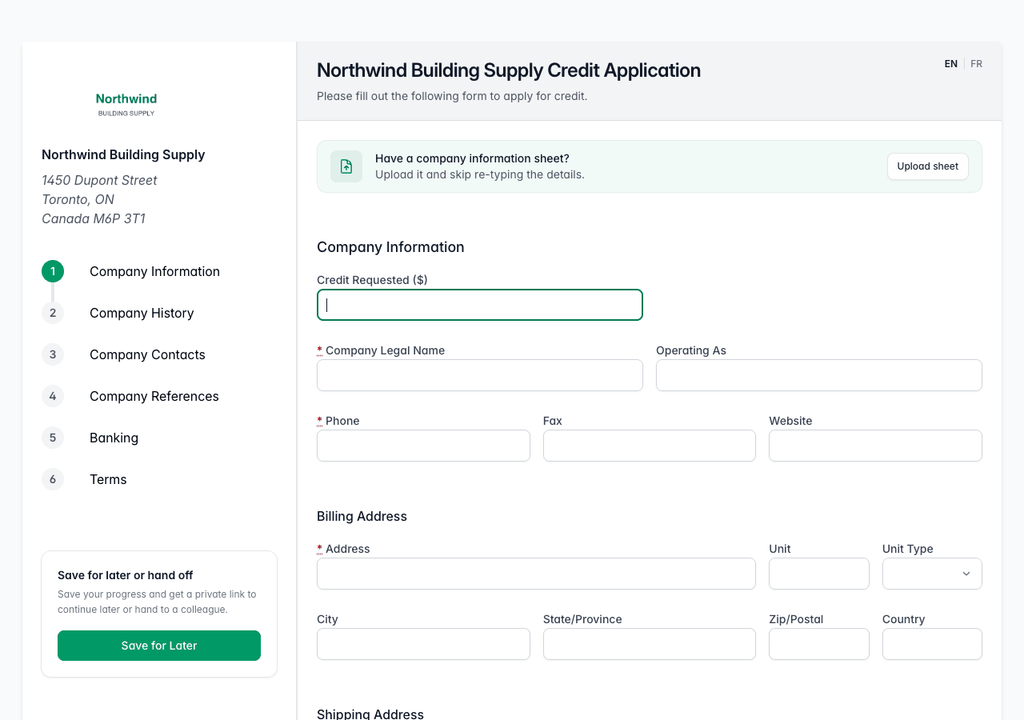
The public application form with the title and subtitle across the top and the Northwind logo, company name and address in the left column. - On the printable blank application, and on the PDF of every submitted application, the address is printed beside the logo and the title and subtitle are printed on the right.
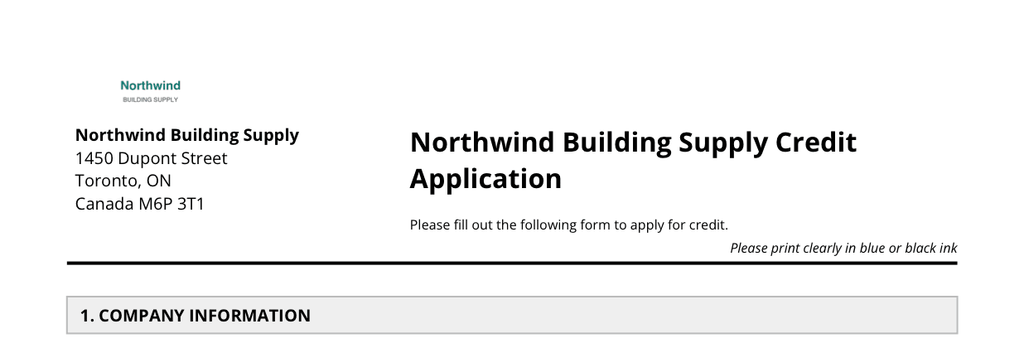
The top of the printable blank application, with the logo and address on the left and the title and subtitle on the right above the first section.
Applications that were submitted before you changed the wording keep the wording they were submitted with on their saved copy and PDF.
Tips & notes
- Check the printed copy. Click Download Blank Application (EN) at the top of Application Settings after saving. A long title wraps onto two lines on paper, which is fine, but a long subtitle can push the first section down the page.
- The company name is not set here. The name printed beside the address is your account name, which an account admin changes from Edit Account on the Accounts page. See "Manage your accounts".
- The subtitle is plain text. Line breaks are kept, but there is no bold, no links and no bullets. If you need more than a sentence or two, put it in the terms or in a section on the form instead.
- Saving the page saves every section on it, so finish or undo any other change on Application Settings before you click Save Configuration.
Related articles
- Upload your company logo
- Set your application link and submission options
- Build your application form with the form builder
- Manage your accounts