Your profile is the one page in Credlab that is only about you: the name your colleagues see, the address Credlab writes to, the clock it shows times on, which emails it sends you, your password, and the extra code you can ask it for at sign-in. Nothing you change here touches anyone else on your account, and nothing here changes a credit file. This article covers all of it, from the name at the top of the page to turning two-factor authentication on.
Before you start
- Everybody who signs in to Credlab has a profile. There is nothing to switch on first and no permission to ask for.
- Your settings are yours alone. Turning an email off stops it reaching you, not your colleagues.
- Everything in this article lives on one of two pages behind your profile picture in the top right corner: Profile and Password.
- Credlab writes to the address in Email and you sign in with it, so keep it current.
- Adding people, removing people, and changing what they are allowed to do is a separate job for an account admin. See Invite a user and set their permissions.
Open your profile
- Click your profile picture in the top right corner, then click Profile. Credlab opens Edit Profile, with the settings pages you can reach listed down the left.
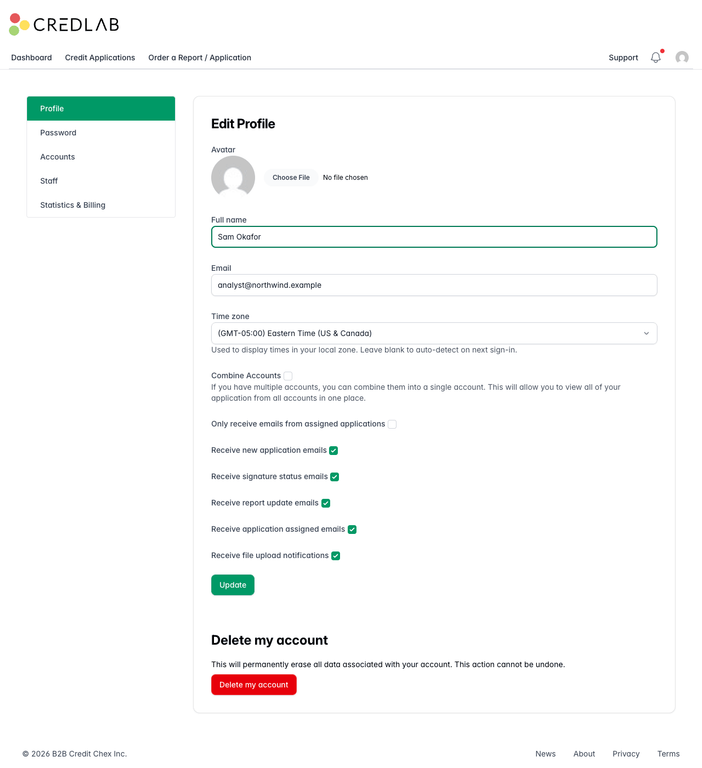
The Edit Profile page showing Avatar, Full name Sam Okafor, Email, Time zone, and the email notification switches above an Update button.
Everything on this page saves together. Change as much or as little as you like, then click Update once at the bottom. Credlab saves and takes you back to your dashboard with a note that your account has been updated, so come back to Profile if you want to see what stuck.
Change your name, picture, or email address
- Type the name your colleagues should see into Full name. It is the name that appears wherever Credlab records who did something, so use the one your team knows you by.
- Click Choose File under Avatar to upload a photo. Credlab shows a plain grey silhouette until you do, unless the address you sign in with already has a Gravatar picture, in which case that picture appears instead. A png, jpeg, heic or webp image is accepted, and Credlab shrinks it for you.
- Change Email only when your work address really has changed, because it is also how you sign in.
- Click Update.
A new email address is not swapped in straight away. Credlab sends a confirmation link to the new address and keeps the old one working until you click that link, and the profile page shows a note telling you which address it is waiting on. If the message never arrives, check the spam folder before trying again.
Set your time zone
- Choose your zone from Time zone and click Update.

The Time zone field set to Eastern Time (US & Canada), above the note that it is used to display times in your local zone.
This setting decides every date and time Credlab shows you: when an application arrived, when a report came back, when a colleague left a note. Move it and the whole app re-reads in your local clock.
Leave it on Auto-detect from browser and Credlab picks the zone up from your computer the next time you sign in. Set it by hand if you travel and want the times to stay on your office clock wherever you are, or if your computer's own clock is set to something other than where you work.
Choose which emails Credlab sends you
The switches under the time zone decide which emails reach your inbox.
- Tick the emails you want and untick the ones you do not, then click Update.
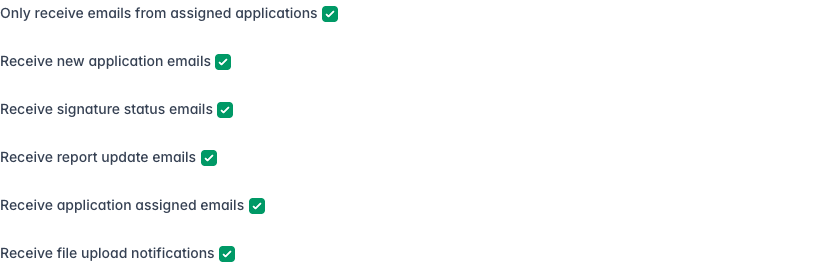
The six email switches, with Only receive emails from assigned applications now ticked alongside the five other notification settings.
Here is what each one sends.
- Only receive emails from assigned applications narrows two of the settings below, report updates and document uploads, to the credit files somebody has actually put your name on. Leave it off and you hear about every file on the account.
- Receive new application emails tells you when somebody fills in your application form and a new credit file appears.
- Receive signature status emails tells you when an applicant signs an application you sent for signature.
- Receive report update emails covers the credit report side of a file: a report you ordered is ready, a recurring review has been ordered, a review is due, a review is stuck.
- Receive application assigned emails tells you when a colleague assigns a credit file to you.
- Receive file upload notifications tells you when an applicant uploads a document you asked for.
These switches only control email. The bell in the top menu keeps counting the same events either way, so turning an email off quietens your inbox without hiding anything inside Credlab.
Combine Accounts, above the email switches, is for people who belong to more than one Credlab account. Tick it and your applications list and your notifications show everything from all of your accounts at once instead of only the account you are currently in. Leave it alone if you only have the one.
Change your password
- Click Password in the list on the left.
- Type the password you use today into Current password. Credlab asks for it so that nobody who finds your screen unlocked can change it.
- Type the new one into New password. It has to be at least six characters.
- Type it again into Confirm new password. The eye at the right of each box shows you what you typed, so you can check before you send it.
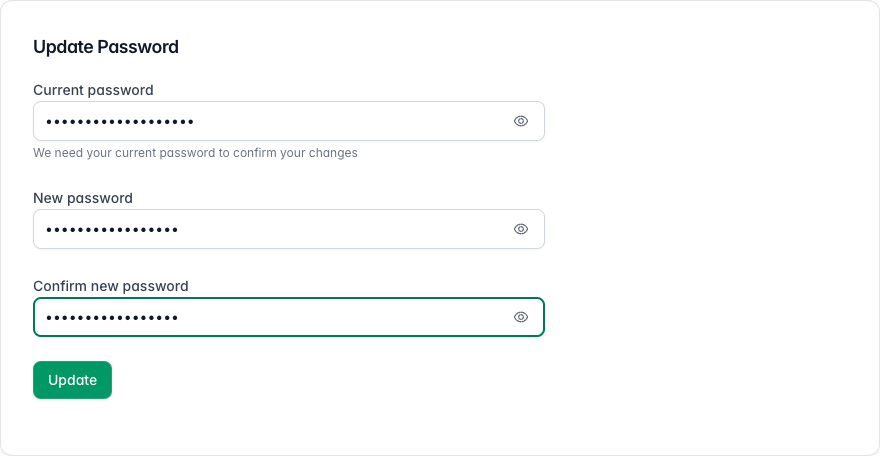
The Update Password card with Current password, New password, and Confirm new password filled in above the Update button. - Click Update. Credlab confirms the change and leaves you signed in, so there is nothing to do afterwards.
If you cannot remember the current one, sign out and use Forgot password? on the sign-in page instead. Credlab emails you a reset link.
Turn on two-factor authentication
Two-factor authentication asks for a short code from your phone on top of your password, so a stolen password is not enough to get into your credit files on its own. You need an authenticator app on your phone first. Authy, Google Authenticator, 1Password and Microsoft Authenticator all work the same way here.
- Click Password in the list on the left and scroll down to the Two-factor Authentication card.

The Two-factor Authentication card explaining that a one-time code will be required, with an Enable two-factor authentication button. - Click Enable two-factor authentication. Credlab shows sixteen backup codes.
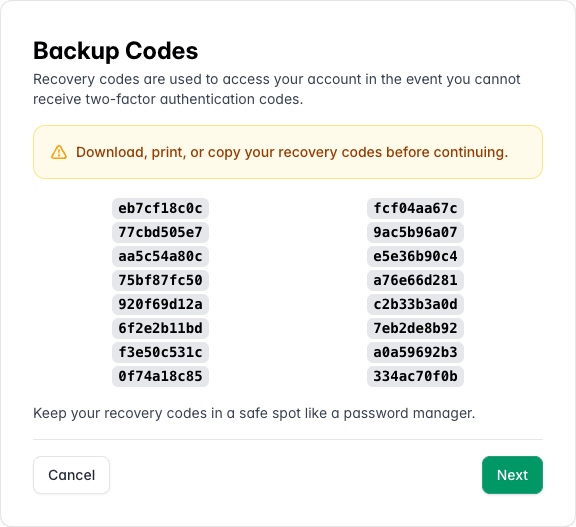
The Backup Codes page listing sixteen recovery codes, a warning to save them first, and Cancel and Next buttons. - Copy the codes into your password manager, or print the page, before you go any further. This is the only time Credlab shows them to you, and they are how you get back in if you lose your phone.
- Click Next. The setup page opens with a QR code on it.
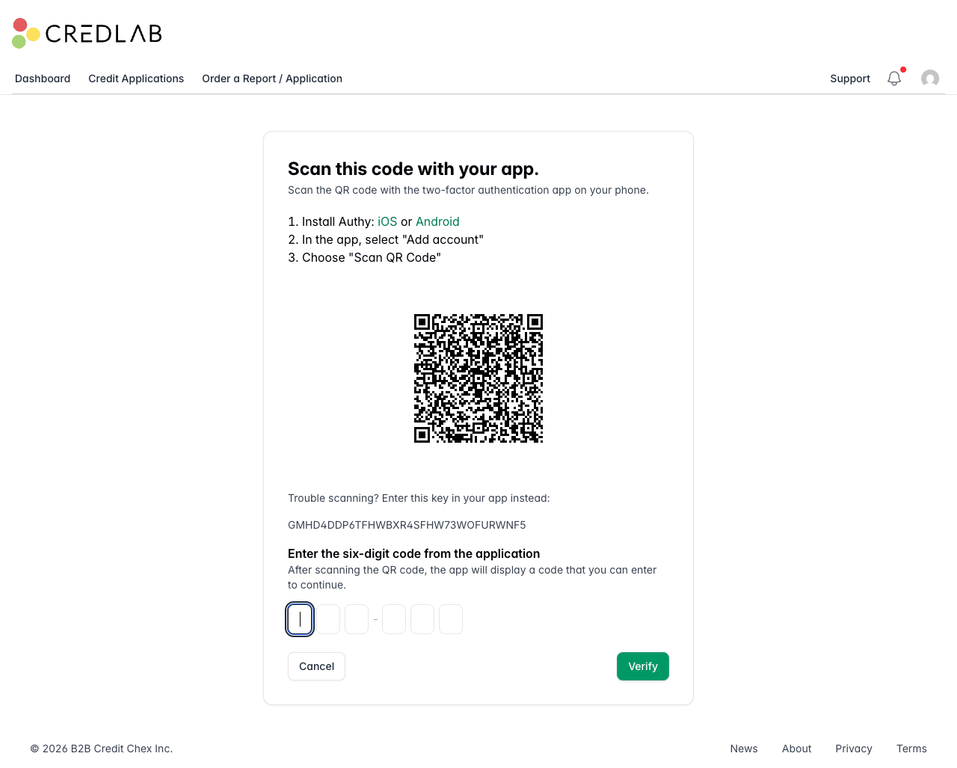
The setup page with a QR code to scan, a typed key as a fallback, six code boxes, and a Verify button. - Open your authenticator app, choose to add an account, and scan the QR code. If the camera will not read it, type the key printed under Trouble scanning? into the app by hand instead.
- Type the six digit code your app is showing into the boxes at the bottom of the page.
- Click Verify. Credlab confirms that two-factor authentication is on, and the card changes to offer to turn it off again.

The Two-factor Authentication card after setup, now offering a red Disable two-factor authentication button.
Sign in with a code
- Type your email and password on the sign-in page as usual and click Sign in. Credlab asks for a Verification code instead of taking you to your dashboard.
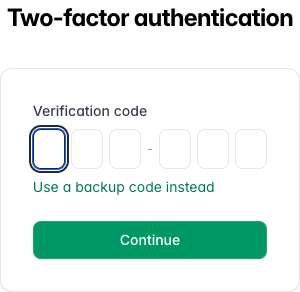
The sign-in prompt headed Two-factor authentication with six Verification code boxes, a Use a backup code instead link, and Continue. - Type the six digit code from your authenticator app. Credlab lets you through as soon as the sixth digit is in, so there is usually no need to click Continue.
Your app rolls the code over every thirty seconds. If one is refused, wait for the next one rather than retyping the same digits.
Without your phone, click Use a backup code instead and type one of the sixteen codes you saved. Each code works once and is then used up, so cross it off your list.
Turn two-factor authentication off
- Click Password in the list on the left and scroll down to the Two-factor Authentication card.
- Click Disable two-factor authentication and confirm.
Turning it back on later starts from scratch: a new QR code to scan and a fresh set of sixteen backup codes. The old codes and the old entry in your authenticator app stop working, so delete that entry from the app and save the new codes.
Tips & notes
- Save the backup codes properly. A password manager, a printout in a locked drawer, anywhere you will still have it on the day your phone is in a taxi. Credlab does not show them again.
- Locked out with no phone and no codes? Nobody on your account can turn two-factor off for you. Ask a colleague on your account to open a support ticket for you, or email service@credlab.com from the address on your profile.
- Your profile is not your account. Your company's application form, its export settings, and who else can sign in all live elsewhere and are set by an account admin.
- Turning an email off does not turn the work off. The credit file still moves, the bell still counts it, and a colleague may still be waiting on you. Use Only receive emails from assigned applications rather than switching everything off if the volume is the problem.
- Delete my account, at the bottom of the profile page, is permanent. It erases your user and cannot be undone. If you are simply leaving the company, ask an account admin to remove you instead so your work stays on the account.
Related articles
- Invite a user and set their permissions
- Record the decision and assign your team
- Get help: support tickets and What's new