An export profile is a saved spreadsheet layout: which columns come out, in what order, under what headings, and in what file format. Build the layout your accounting or CRM system expects once, and everyone on your account can pull the same file from the applications list or from a single credit file without editing anything by hand afterwards. This article covers opening Export Settings, creating a profile, choosing and naming its columns, making it your default, and using it.
Before you start
- You need to be an account admin. Everyone on your account can export, but only admins can change what an export contains.
- Export Settings is one of the settings pages behind your profile picture in the top right corner.
- You do not have to do this. Until you create a profile, both export buttons give you a standard CSV with a fixed set of columns, and they go on working exactly as they are.
- Once you create your first profile, those buttons become menus. Export Results to CSV at the bottom of the applications list becomes Export Results, and Export to CSV on a credit file becomes Export, each listing your profiles.
- Nothing here changes your application form or the information Credlab holds. A profile only decides what a downloaded file looks like.
- Profiles belong to the account, not to you, so everyone on your team sees the ones you create.
Create a profile
- Open Export Settings from the menu behind your profile picture in the top right corner.
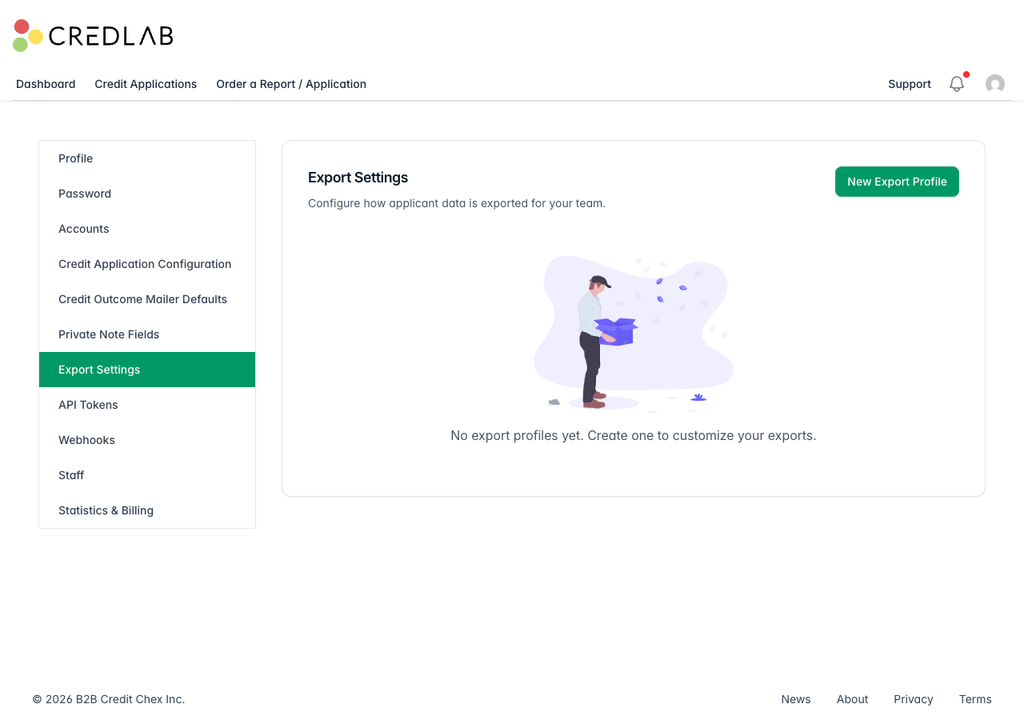
The Export Settings page with a New Export Profile button and a message saying there are no export profiles yet. - Click New Export Profile and type a name in Profile name, such as Weekly approvals. The name is only for your team, so make it say what the file is for.
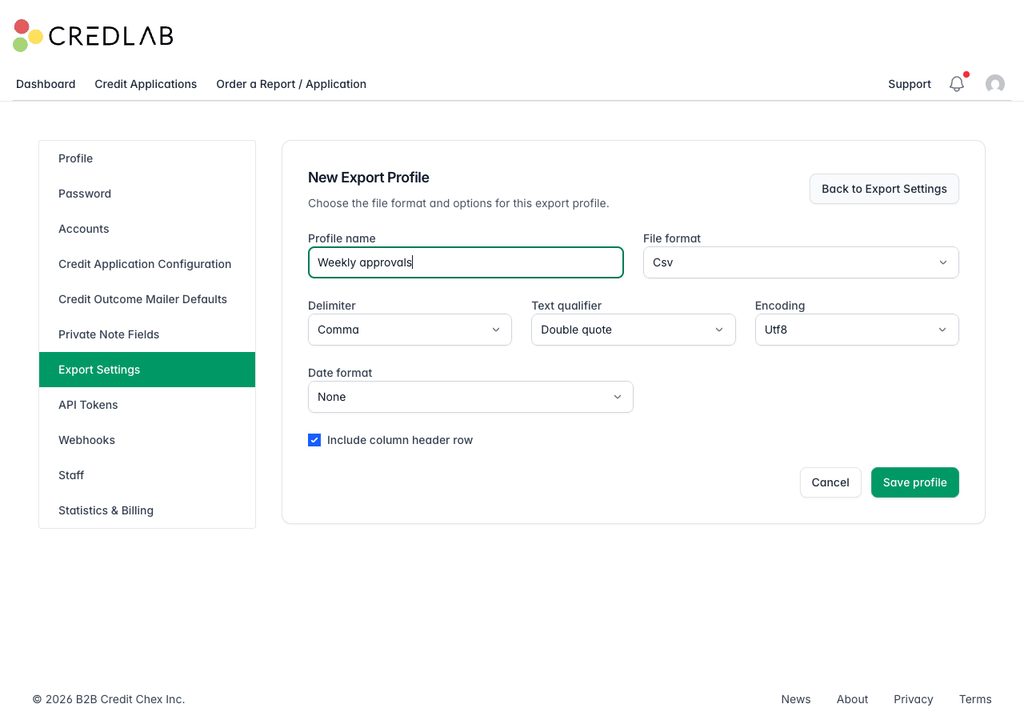
The New Export Profile page with Weekly approvals typed in Profile name and the file format options set to a standard CSV. - Change any of the file options you need. They start on the settings most systems expect, so leave them alone unless the system you are feeding asks for something different. The options are explained below.
- Click Save profile. The profile is created and the page comes back with a Fields section underneath the options.
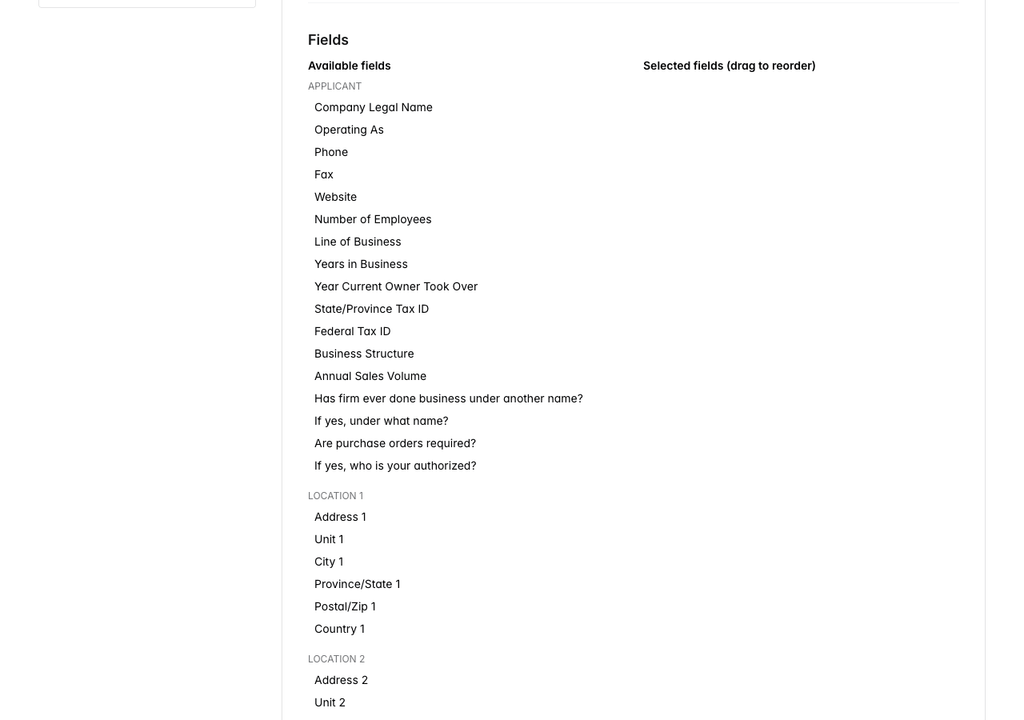
The Fields section with an Available fields list grouped under Applicant and Location 1, and an empty Selected fields column.
Here is what each file option does.
- File format is Csv, Xlsx for Excel, Tsv for tab separated, or Fixed width.
- Delimiter is the character between columns: Comma, Semicolon, Tab or Pipe.
- Text qualifier is what wraps a value that has a comma inside it: Double quote, Single quote or None.
- Encoding decides how accents and other special characters are written. Choose Utf8 bom if Excel opens your file with the accents scrambled.
- Date format leaves dates alone on None, or writes them as Iso8601 (2026-09-18), Us (09/18/2026) or Uk (18/09/2026).
- Include column header row puts your column headings in the first row. Turn it off if the system you import into expects data only.
The delimiter, text qualifier and encoding boxes disappear if you choose Xlsx or Fixed width, because those formats have no use for them. You can come back and change any of this later: open the profile from Export Settings, change the options and save again.
Choose the columns
- Click the names you want in Available fields, in the order you want the columns to come out. Each one moves across to Selected fields on the right.
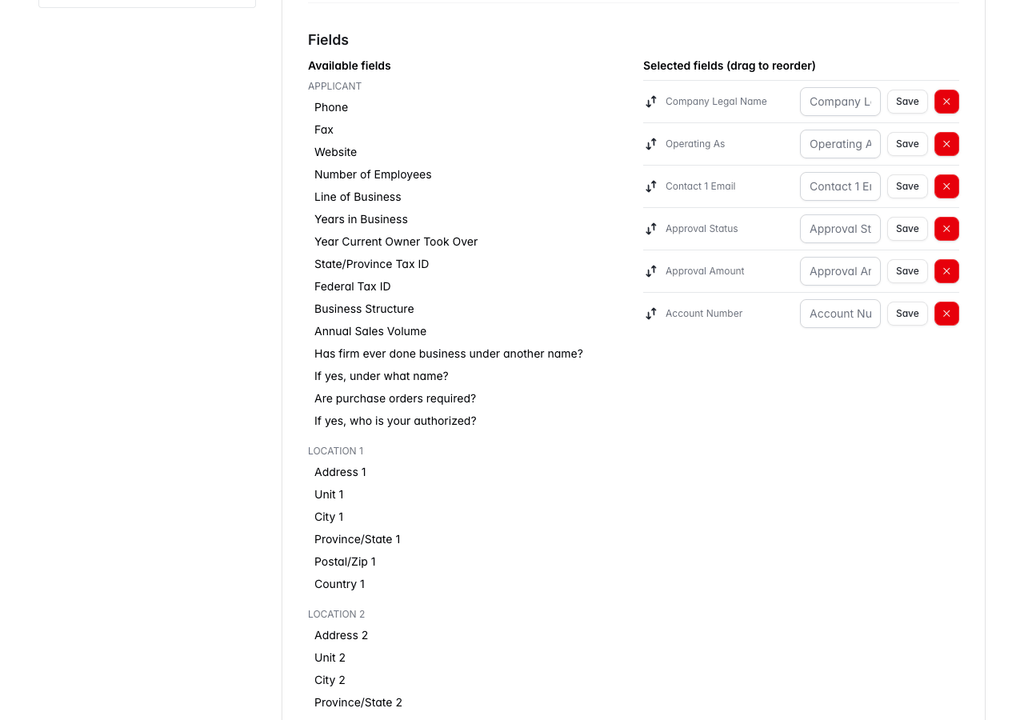
The Fields section with six names moved into Selected fields, from Company Legal Name down to Account Number. - Type a heading in the box on a row and click Save on that row to give the column a different name in the file. Leave the box empty to keep the name Credlab uses.
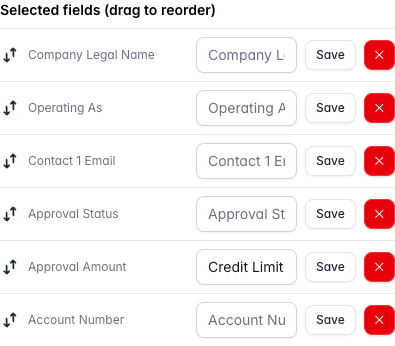
The Selected fields column with six rows, and the Approval Amount row renamed to Credit Limit in its heading box. - Drag a row by the grip on its left to move a column earlier or later in the file.
- Click the red cross at the end of a row to take that column out again. The name goes back to Available fields.
Available fields is grouped the way a credit file is: Applicant for the company itself, Location 1 and Location 2 for its addresses, Contact 1 to Contact 3 for the people on the application, and Credit Application for what your team recorded, such as the approval status, the approved amount, the account number and the dates. If your account collects extra Credlab fields on its form (the ones Credlab has added to your account's form, not custom questions built in the form builder) or uses private note fields, those appear as groups of their own further down the list.
There is no limit on how many columns a profile has, and the same field can only be in a profile once.
Make it your default
- Click Back to Export Settings at the top of the page. Your profile is listed with its format and the number of columns in it.
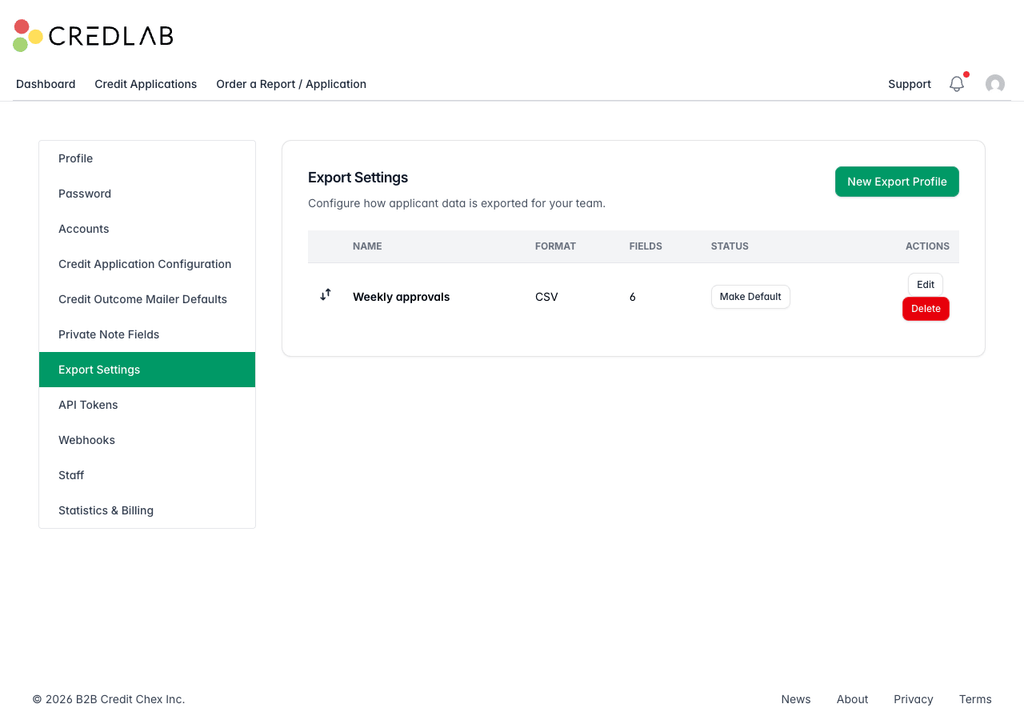
The Export Settings list with one row for Weekly approvals, showing CSV, six fields, and a Make Default button. - Click Make Default on the row. The Status column changes to a green Default badge.
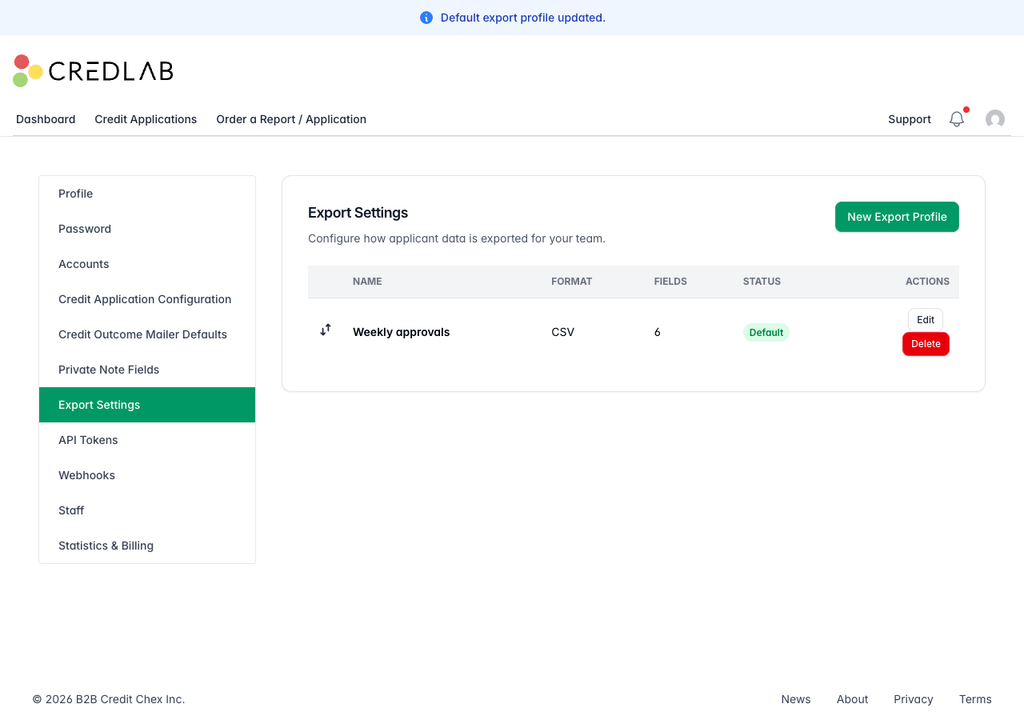
The same list after the change, with a green Default badge on the Weekly approvals row and a confirmation message at the top.
The default is the profile Credlab marks as the usual choice in a file's export menu. It does not stop anyone picking a different one.
Export using your profile
- Scroll to the bottom of the applications list and click Export Results. A menu lists every profile on your account with its format.
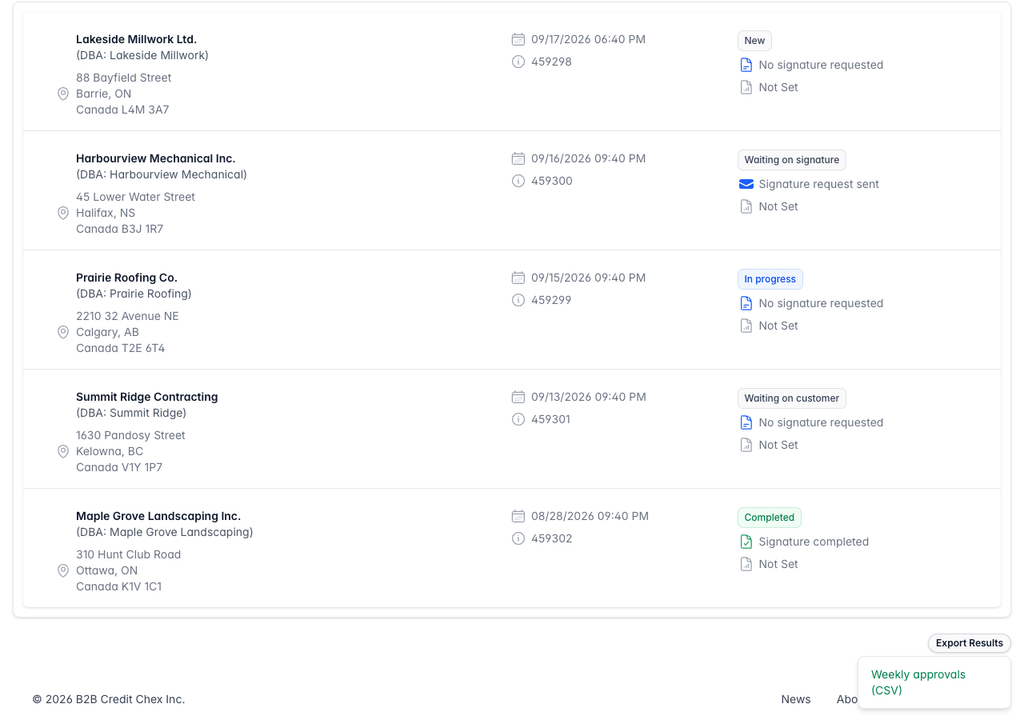
The bottom of the applications list with the Export Results button and a menu below it offering Weekly approvals in CSV. - Click the profile you want. The file downloads straight away and covers every file that matches your current search and filters, not only the rows on the screen.
- To export one credit file on its own, open it and click Export in the Applicant Summary band.
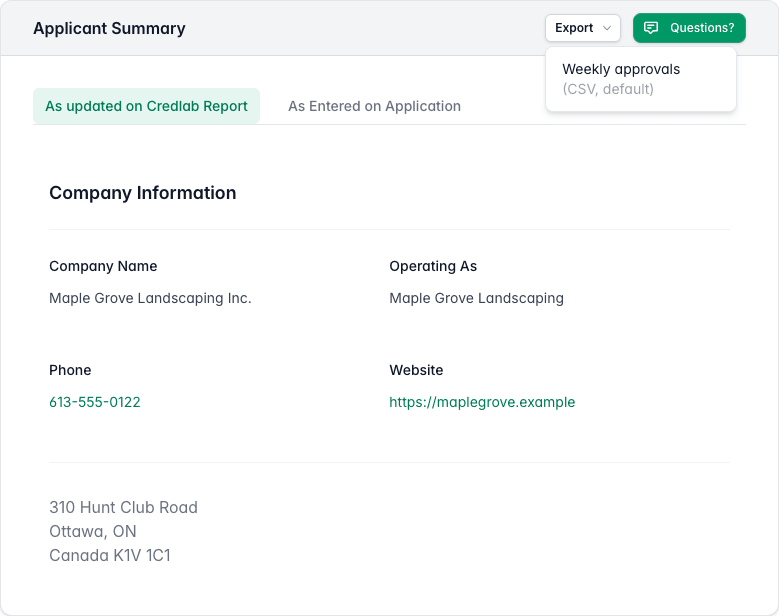
The Applicant Summary band of a credit file with the Export menu open, offering Weekly approvals marked CSV, default. - Click the profile you want. The file downloads with that one applicant in it.
Tips & notes
- One profile can be the default, and only one. Making a second profile the default takes the badge off the first.
- Build a profile per destination. A layout for your accounting system and a shorter one for a weekly review can both sit in the list, and the menus offer them side by side.
- Drag the rows in the Export Settings list to decide the order the profiles appear in the export menus.
- Editing a profile changes it for everyone straight away. Files your team already downloaded are untouched, but the next export uses the new layout, so tell the people who import the file before you move columns around.
- Deleting a profile is safe. Delete the last one and both export buttons go back to offering the standard CSV, so an export is never left broken.
- Fixed width needs a width. Choose the Fixed width format and every chosen column gets a width box next to it, and a column will not save without one.
- Empty is empty. A column comes out blank for a file that has nothing recorded in that field, so the column count is the same on every row.
- The field list is the one Credlab maintains. Custom questions you add in the form builder are not on it, so if you need one of those answers in a spreadsheet, ask Credlab about it first. See "Build your application form with the form builder".
- Very large exports are prepared in the background. If thousands of files match your filters, Credlab tells you the export is being prepared and sends it to your notifications when it is ready, rather than making you wait on the page.
Related articles
- Find and open a credit file
- Build your application form with the form builder