Most application forms carry a question that only matters some of the time. "If yes, under what name?" is wasted on the applicants who answered no, and a field that is required of everyone turns into a nuisance for the people it was never meant for. A conditional rule fixes both. It tells Credlab to show a field only when another answer calls for it, or to require a field only when another answer calls for it. You write the rules in the form builder, in the same settings panel you use for a field's label, and they take effect when you publish.
Before you start
- You need to be an account admin, and you write rules in the form builder. See "Build your application form with the form builder" for opening the builder, saving, previewing and publishing.
- A rule goes on the field that is being shown or required, not on the field that decides it. Open the settings of the field you want to control.
- The field that decides the rule is called the trigger in this article. It has to be on the same step as the field it controls, or on an earlier one. Credlab only offers you questions that qualify.
- Each field can carry one show rule and one require rule. There is no way to combine two questions into a single rule.
- Nothing reaches your applicants until you publish, exactly as with any other builder change.
Open a field's conditions
- In the builder, click the field you want to control. Its settings slide in from the right.
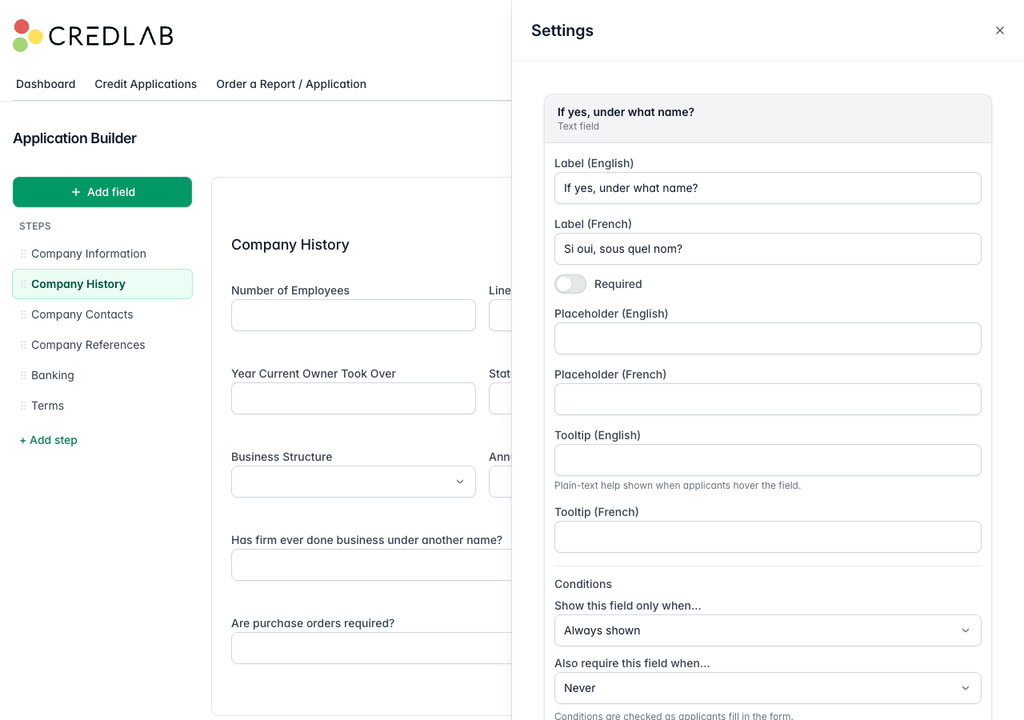
The form builder with the If yes, under what name? field selected and its settings panel open, showing Conditions at the bottom. - Scroll the panel down to Conditions, below the field's labels and its Required switch.
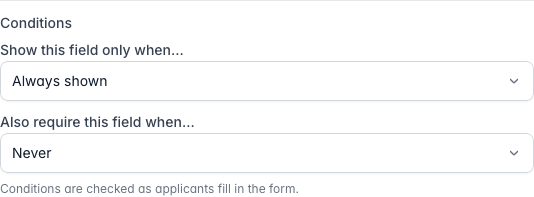
The Conditions block at the bottom of the settings panel, with both rules at their defaults of Always shown and Never.
There are two rules in the block, and they work independently.
- Show this field only when… hides the field until the answer you name comes in. Its default, Always shown, means there is no rule.
- Also require this field when… turns the field into a required one while the answer you name holds. Its default, Never, means there is no rule.
If a field has no Conditions block, it cannot carry rules. Signature fields and whole sections such as references, contacts and terms are the usual cases.
Show a field only when another answer calls for it
The example below is the pair most forms already have: a yes or no question, and the follow up question that only makes sense after a yes.
- Open the follow up field's conditions, then pick the deciding question from the list under Show this field only when…. Each entry names a field and the step it sits on. A comparison box and the answers to choose from appear underneath.
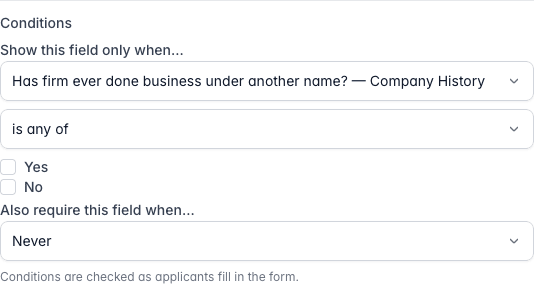
The show rule with the drop down question chosen as the trigger, a comparison reading is any of, and Yes and No tick boxes. - Tick the answers that should bring the field out. Tick more than one if any of them should do it.
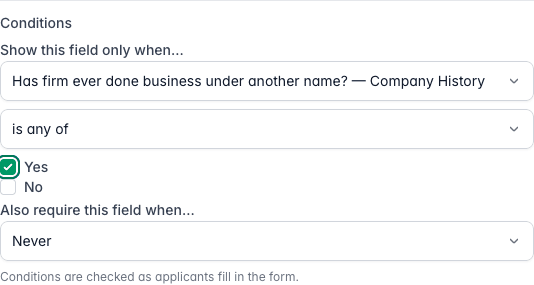
The same show rule with the Yes tick box ticked, so the field appears only for applicants who answer Yes. - Click Save at the bottom of the panel. The panel closes and the field picks up a small blue if badge on the canvas, which is how you spot a field with rules at a glance.
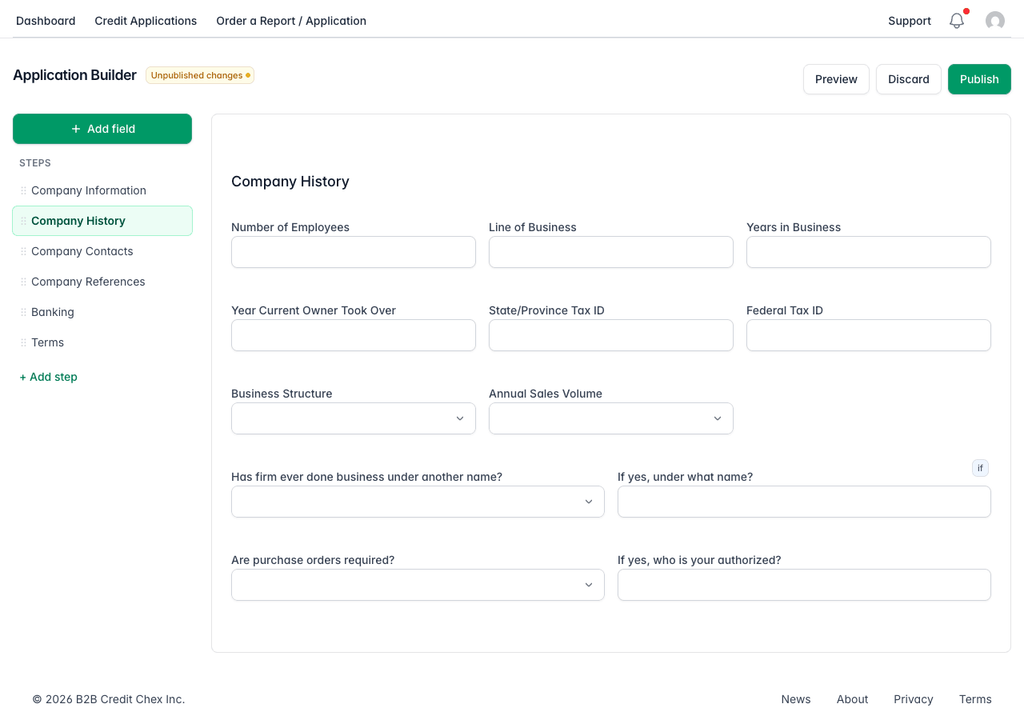
The builder canvas with a small blue if badge on the If yes, under what name? field and an Unpublished changes badge above.
The comparison box offers different choices depending on the kind of field you picked as the trigger.
- A drop down or multi select trigger offers is any of, with a tick box for each of its options.
- A tick box trigger offers is checked and is not checked, and needs no value.
- Any other field, such as a text box or a date, offers has any value, is blank, is exactly and is not. The last two need you to type the value to compare against, in the box below.
Require a field only when another answer calls for it
A require rule is written the same way, in the second half of the Conditions block. It adds to the Required switch rather than replacing it: a field already switched on as required stays required for everybody.
- Open the field's conditions again, pick the deciding question under Also require this field when…, and tick the answers that should make the field compulsory.
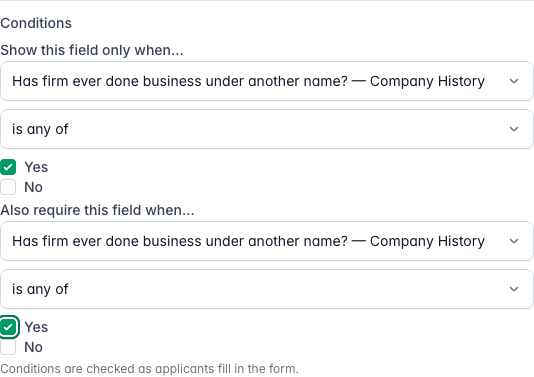
The Conditions block with both rules set to the same drop down question and Yes, one to show the field and one to require it. - Click Save.
Pointing both rules at the same question is the normal case. It means the field stays out of the way until it is relevant, and is then compulsory, which is usually what you wanted from a follow up question in the first place.
A require rule never forces a hidden field. If your show rule is hiding the field, nothing is asked for and nothing is checked.
Change or remove a rule
- Open the field's conditions, then set Show this field only when… back to Always shown, or Also require this field when… back to Never. The comparison and the answers disappear with it.
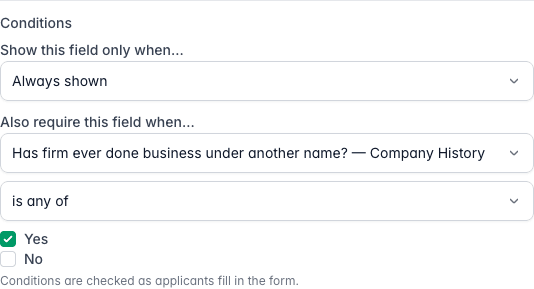
The Conditions block with the show rule set back to Always shown and the require rule still pointing at the drop down question. - Click Save. To change a rule rather than clear it, pick a different question or tick different answers and save in the same way.
Clearing one rule leaves the other alone, so you can stop hiding a field while still requiring it conditionally, or the other way round.
What your applicants see
A field with a show rule is not on the page at all when the rule is not met. As soon as an applicant gives the answer you named, the field appears in place, and it goes away again if they change their mind. A field with a require rule picks up the red asterisk the moment the answer matches, and the form refuses to move on until it is filled in. Applicants are never told a rule exists, and they never see the wording you chose in the builder.
The builder's Preview cannot show you this. Preview shows the draft layout with every box switched off and only applies rules that are already published, so a rule you have just added has no effect there. Use it to check the wording and position of your fields, then test the rule itself by opening your own application link once you have published. Fill the trigger in one way, then the other, and watch the field come and go.
Tips & notes
- Rules only reach applicants when you publish. Until then the rule lives in your draft, and your live form goes on asking everyone for the field.
- Credlab checks every rule before it publishes anything. Publishing is blocked, with a message naming the field, if a rule points at a question that is no longer on the form, at a question that has ended up on a later step, or at a drop down option you have since deleted, or if an is exactly or is not rule has no value typed in.
- You cannot delete a field another field's rule depends on. Credlab refuses and names the fields that rely on it, so clear or repoint their rules first.
- Moving a step can break a rule. A trigger dragged below the field it controls is only caught when you publish, not while you are dragging, so re-check your rules after reordering steps.
- Drop down answers are matched in both languages for you. If your form offers French, ticking an option covers its French wording too, with nothing extra to fill in. An is exactly rule on a text box is different: it matches the exact text an applicant types, so use it only where the answer is predictable.
- Reordering a drop down's options is safe; renaming one is not. A rule remembers the option's wording as it read when you saved the rule, and the applicant's answer is matched on that wording, so if you reword an option, reopen every rule that points at it and save it again. Deleting an option breaks the rule outright, and publishing tells you so.
- The document upload section can carry rules too. Select the section on the canvas and its own settings panel has the same Conditions block, so you can ask for attachments only from the applicants who need to send them.
- Bank verification has its own pair of rules. They live in the banking section's settings rather than here. See "Configure bank verification on your form".
- The printable blank application shows every field. Paper cannot branch, so Download Blank Application on the Application Settings page lists conditional fields alongside the rest.
- Keep rules few and obvious. One question deciding one follow up is easy to reason about later. A form where half the fields come and go is hard to check and hard to hand over.
Related articles
- Build your application form with the form builder
- Configure bank verification on your form
- Set up your terms, signatures and personal guarantee
- Set up references, locations and contacts on your form
- Share your application link and receive applications