The form builder is where you decide what your online credit application asks for. You work on a picture of the real form: the steps down the left, the fields in the middle, and a settings panel that slides in when you click something. Nothing you do reaches your customers until you press Publish, so you can take as long as you like over it. This article covers opening the builder, adding and editing a field, arranging fields and steps, previewing your work, publishing it, and throwing a draft away.
Before you start
- You need to be an account admin. Everyone on your account can see and send the application link, but only admins can change the form behind it.
- Your live form keeps working the whole time you are editing. Applicants see the last published version, and anyone part way through an application keeps the form they started on.
- Your changes live in a draft. Opening the builder starts a draft of your current form on its own, but the Unpublished changes badge only appears once you actually change something, and the draft waits for you until you publish it or discard it.
- The builder is a desktop tool. Use a full size screen rather than a phone or a tablet.
- If you would rather not do this yourself, email service@credlab.com and Credlab will build or update the form for you.
Open the builder
- Open Credit Application Configuration from the menu behind your profile picture in the top right corner. The Application Settings page opens.
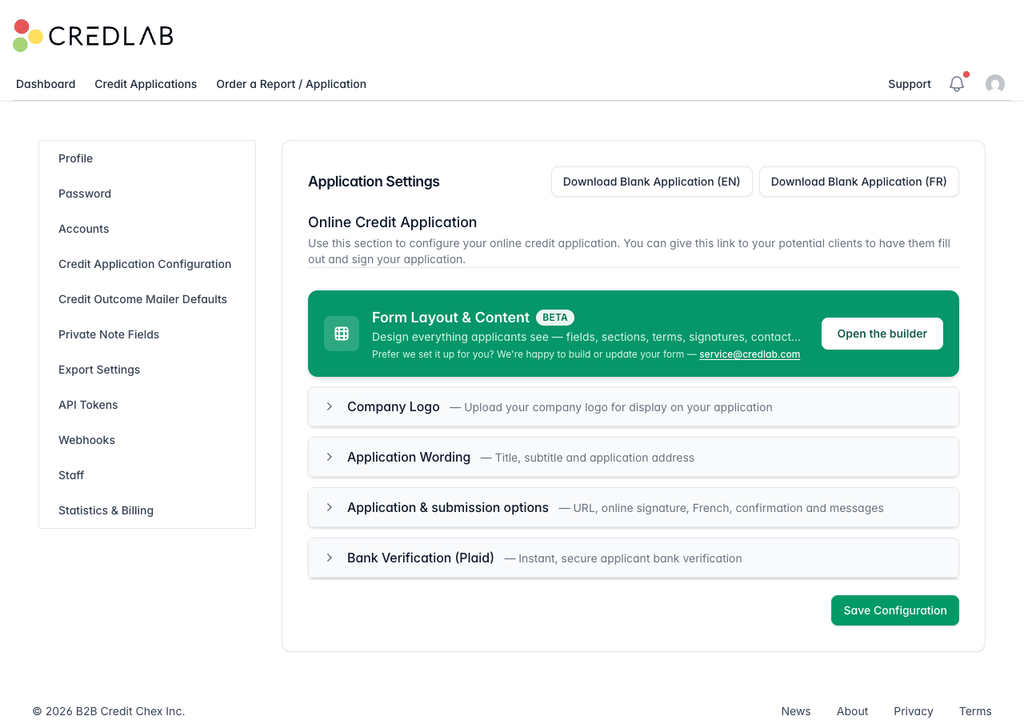
The Application Settings page with a green Form Layout and Content panel and an Open the builder button above the collapsed settings sections. - Click Open the builder in the green Form Layout & Content panel. Everything else on Application Settings is unchanged.
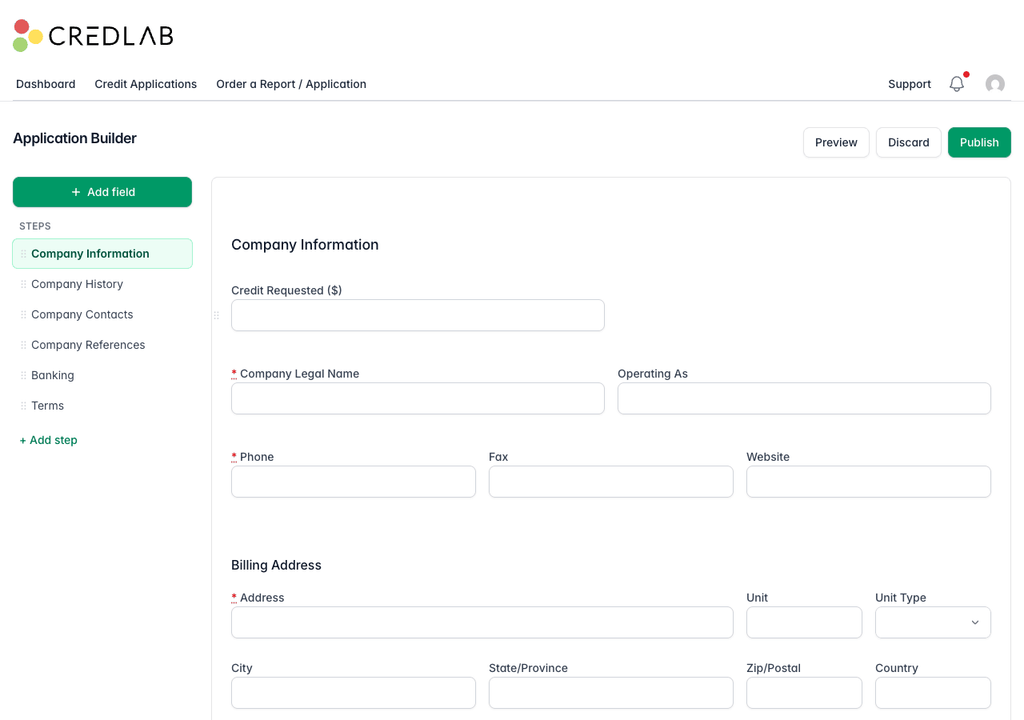
The Application Builder with the steps list on the left, the Company Information step drawn as a real form, and Preview, Discard and Publish buttons.
Find your way around
The builder has three parts.
- The steps list on the left is every step of your application, in the order applicants work through them. Click a name to bring that step into the middle. Drag a name by the dotted grip to move a step. Hover a name to reveal a pencil, which opens that step's settings, and a bin, which deletes it.
- The canvas in the middle is the step you are looking at, drawn with the same fields your applicants see. The boxes are not typeable here: clicking one selects it instead. A red asterisk means the field is required.
- The bar along the top carries the Unpublished changes badge and the Preview, Discard and Publish buttons.
Some blocks on the canvas are whole sections rather than single fields: terms and signatures, references, contacts, locations, banking, and file attachments. They behave as one piece, and they have their own settings. See "Find and change a section's settings" below.
Add a field
The steps below cover adding a custom field, which opens a settings panel for you to fill in before it is added. Clicking an Application fields or Sections entry instead works differently: it drops straight onto the canvas the moment you click it, with no panel.
- Click Add field at the top of the steps list. A drawer opens with everything you can put on the form.
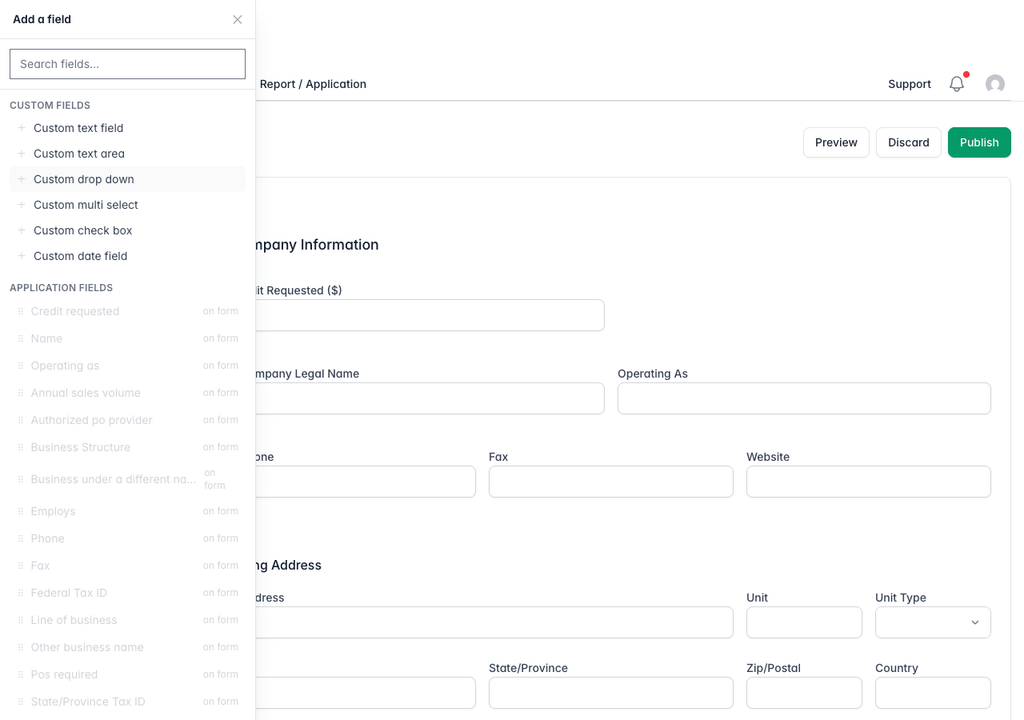
The add a field drawer with a search box, a Custom fields group, and Application fields entries greyed out and marked on form. - Click one of the Custom fields entries, such as Custom drop down, to collect something Credlab does not already have a field for.
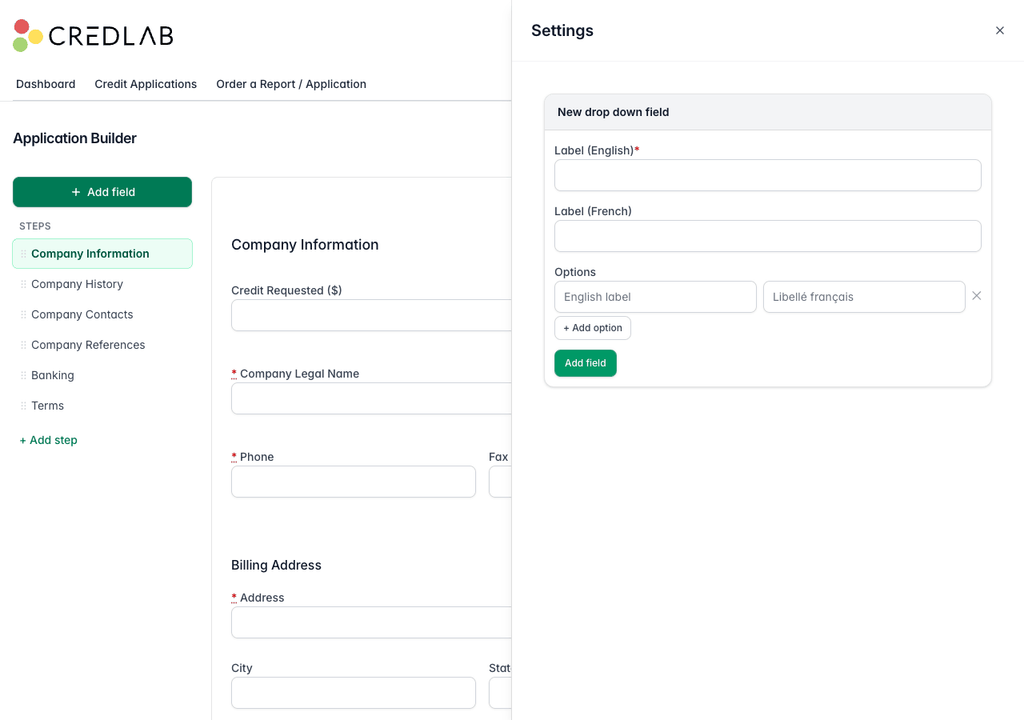
The drawer is replaced by a Settings panel on the right headed New drop down field, with empty Label English, Label French and Options boxes. - Fill in the panel. Type the label applicants will read, the French version if your form offers French, and one line per choice under Options, clicking + Add option for each extra choice.
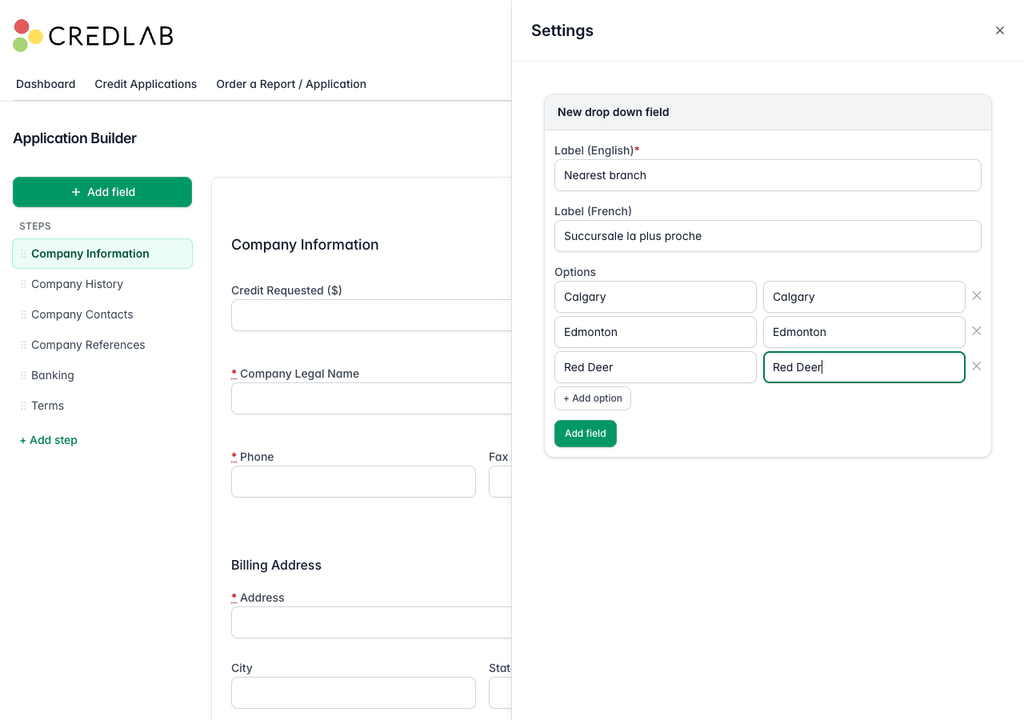
The same panel filled in with Nearest branch, its French label, and three option rows reading Calgary, Edmonton and Red Deer. - Click Add field. The field appears at the bottom of the step you are on, in a row of its own.
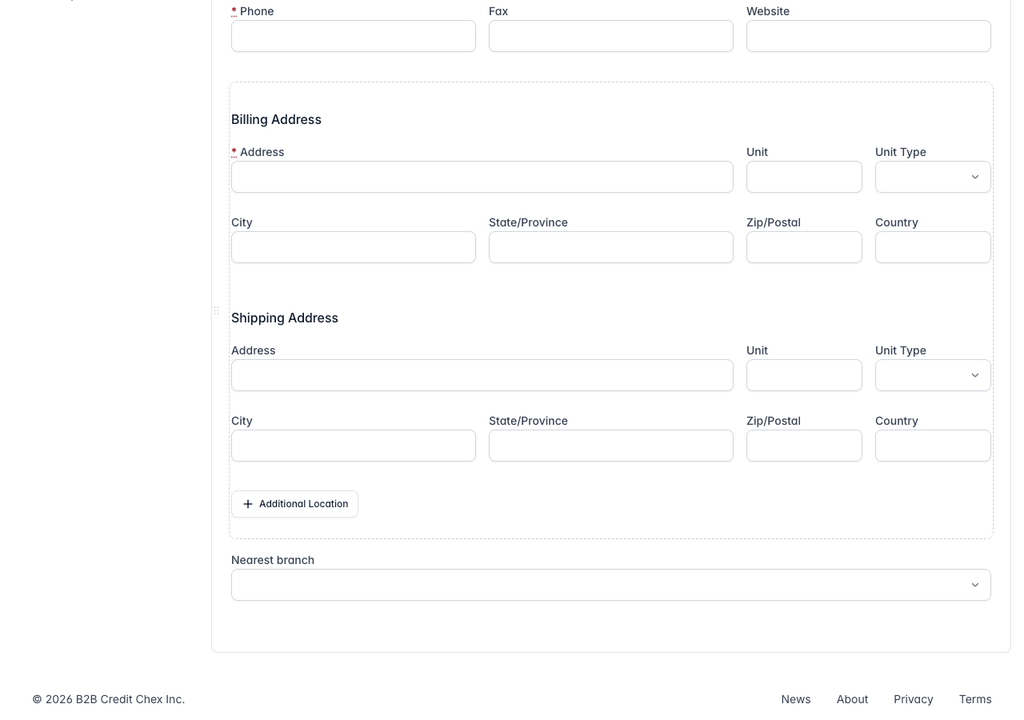
The bottom of the Company Information step on the canvas, with the new Nearest branch drop down sitting below the shipping address block.
Entries greyed out and marked on form are already somewhere on your application, so they cannot be added twice. Use the search box at the top of the drawer if the list is long.
You can also drop an Application field or a Section exactly where you want it. Instead of clicking the entry in the drawer, drag it onto the canvas, or hover the gap between two rows and click the small green plus that appears there before you pick your field.
Change a field's settings
- Click the field on the canvas. It gets a green outline and its settings slide in from the right.
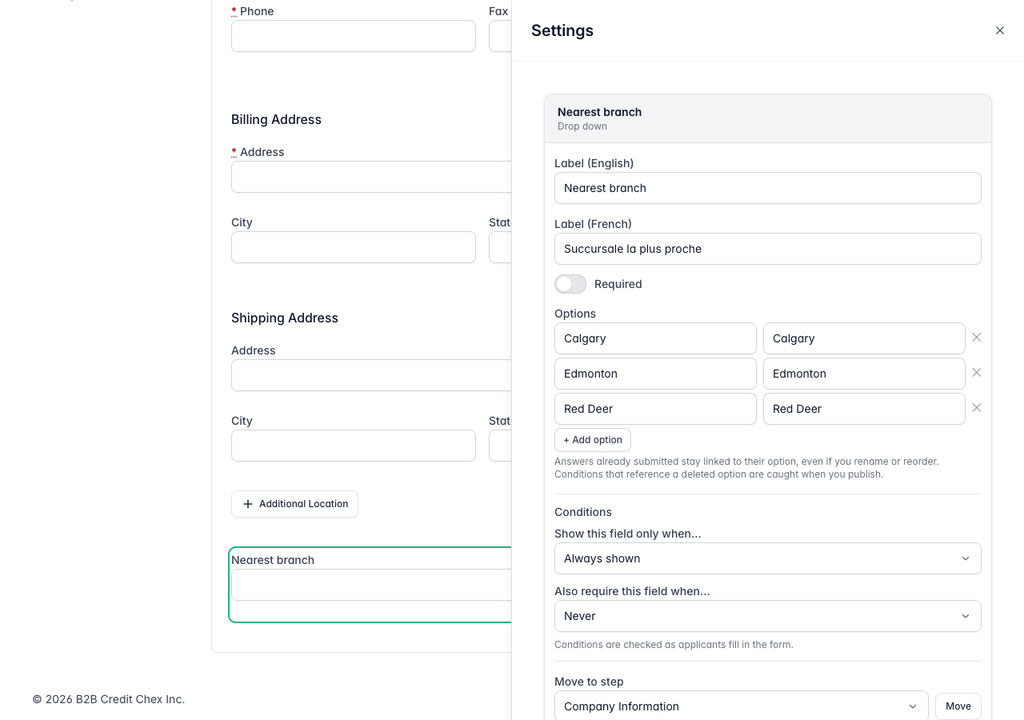
The Nearest branch field outlined in green on the canvas, with its settings panel open showing labels, a Required switch, the options and the conditions. - Change what you need, then click Save at the bottom of the panel. The panel holds the English and French labels, the Required switch, the placeholder and tooltip where the field type allows them, the options for a drop down or multi select, and the conditions that decide when the field is shown or required.
- Click Remove field if you want it gone. Credlab asks you to confirm first.
- Press the Esc key, or click somewhere empty, to close the panel.
To rename a field quickly, select it and then double-click its label on the canvas. Type the new wording and press Enter. That changes the English label only, so use the panel when your form offers French.
The conditions at the bottom of the panel are covered on their own in "Add conditional rules to your form".
Move fields and rows around
- Drag a field onto another field. The two now share a row, and the row is shared out evenly between them.
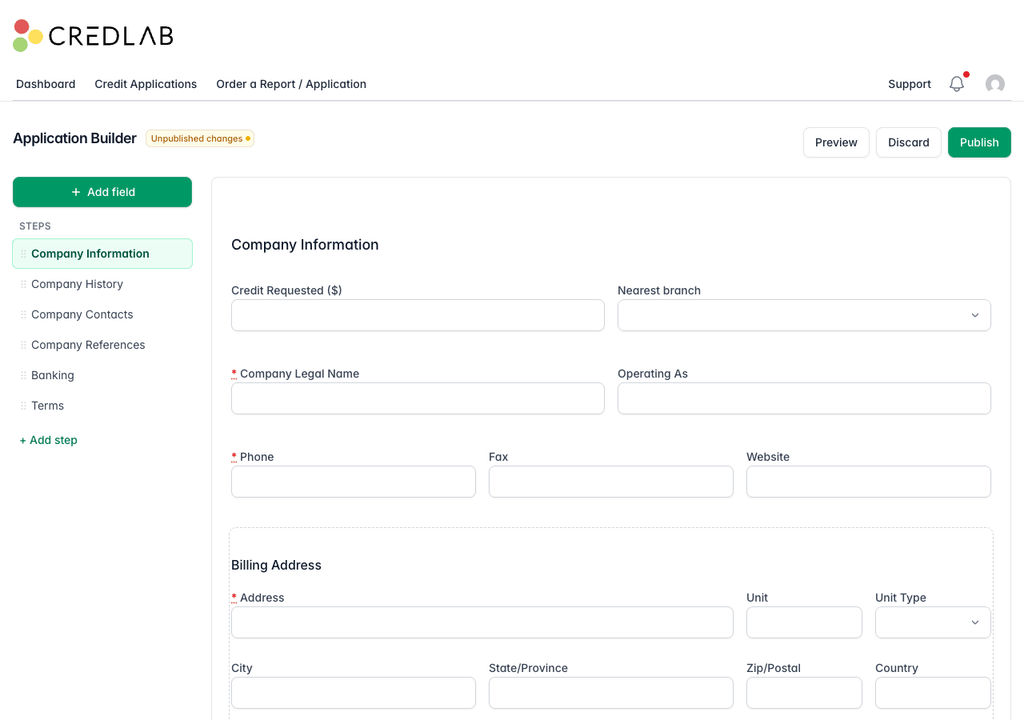
The top of the Company Information step with Credit Requested and Nearest branch side by side in one row, each half the form's width.
There are four more ways to rearrange things:
- Drag a field into the gap between two rows to give it a row of its own at that position.
- Drag a row by the grip in the left margin to move the whole row up or down the step.
- Drag the divider at a field's right edge to make it wider or narrower. It snaps to clean fractions of the row, and a row holds six columns in all.
- Use Move to step at the bottom of a field's settings panel to send a field to another step. Fields cannot be dragged from one step to another.
Add or rename a step
- Click + Add step under the steps list and name the step, in French as well if your form offers French.
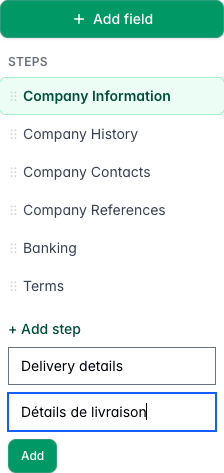
The steps list with the Add step panel open below Terms, showing Delivery details typed in the English box and its French name below it. - Click Add. The new step joins the bottom of the list, empty and ready for fields.
- To rename a step later, hover it in the list and click the pencil. To delete one, hover it and click the bin. A step has to be empty before it can be deleted, and you cannot delete the last one.
Every step needs at least one field on it before you can publish, so either fill a new step or delete it again.
Find and change a section's settings
- Click a section on the canvas, such as the terms block on the Terms step. The whole section is selected and its own settings open.
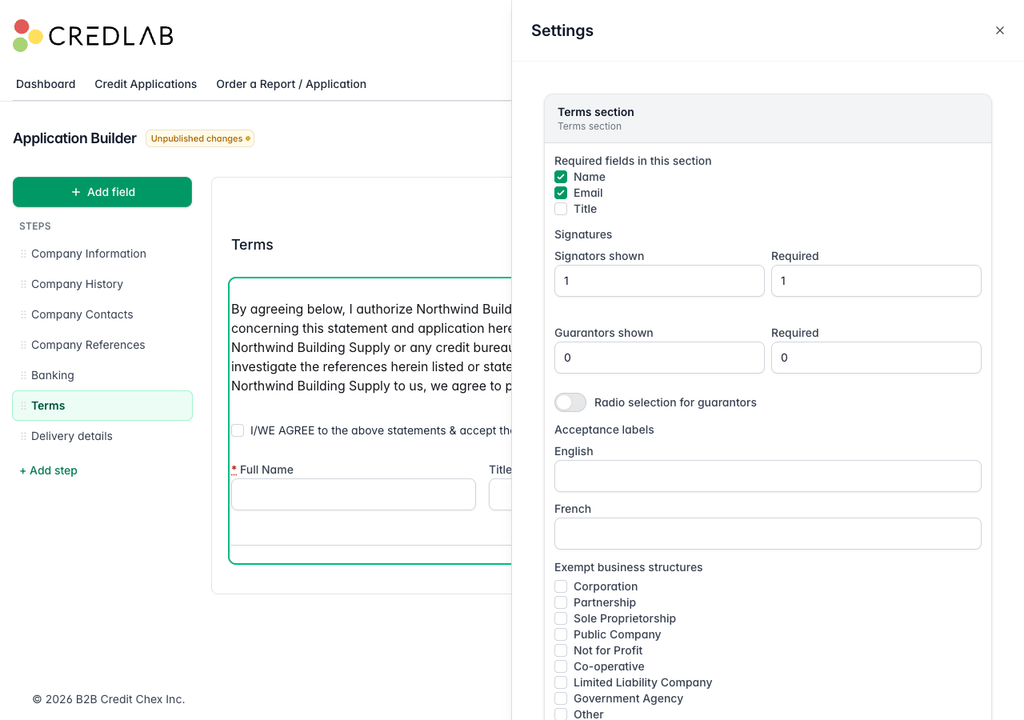
The Terms section outlined in green with its settings panel showing required fields, signator and guarantor counts, acceptance labels and exempt business structures. - Change the settings and click Save.
These panels are where the wording and counts for the special sections live. The existing articles cover them in detail: "Set up your terms, signatures and personal guarantee" for terms, signatures and personal guarantees, "Set up references, locations and contacts on your form" for the reference, location and contact rows, and "Configure bank verification on your form" for banking.
Preview your draft
- Click Preview in the top bar. Your draft opens in a new tab with every step on one page, and a yellow banner at the top reminding you that this is the unpublished draft and the boxes are switched off.
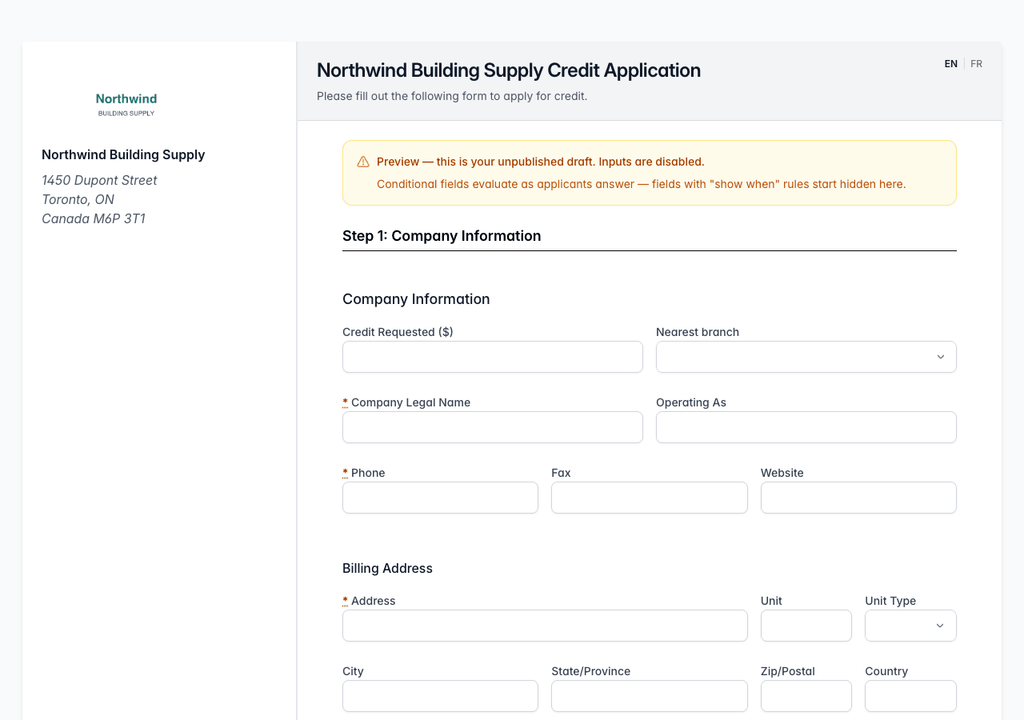
The preview page with the Northwind logo and address, a yellow preview banner, and Step 1 Company Information showing the draft fields. - Read it the way an applicant would, then close the tab and go back to the builder.
Fields with a published "show when" condition start out hidden in the preview; a condition you have only just added in the draft does not apply there yet (see "Add conditional rules to your form").
Publish your changes
- Click Publish in the top bar.
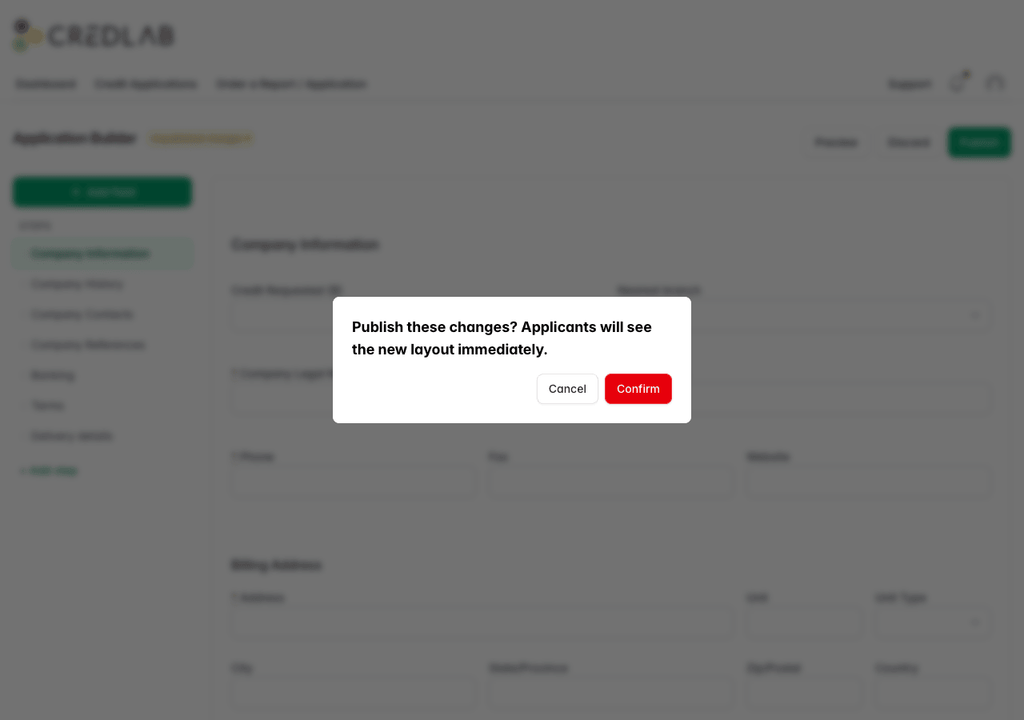
A confirmation box over the builder asking whether to publish these changes, warning that applicants see the new layout immediately, with Cancel and Confirm. - Click Confirm. The Unpublished changes badge disappears and your new form is live at once. Anyone who opens your application link from that moment gets the new version.
Applications that are already submitted keep the form they were filled in on. Their saved copy and their PDF go on showing the layout, the required fields and the terms that the applicant actually agreed to, not the ones you have just published. Your logo, title and subtitle are the exception: those always read from your current Application Settings, so a branding change reaches every past application too.
If publishing is blocked
Credlab checks the whole form before it publishes anything. If something is wrong, nothing is published and a message across the top of the page tells you what to fix.
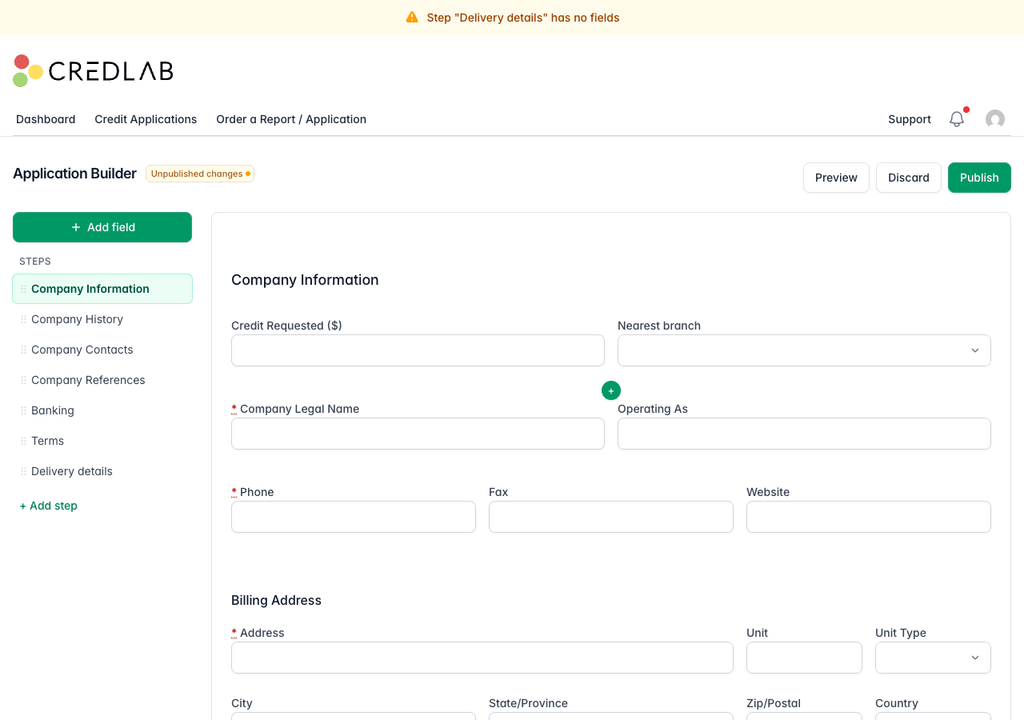
The usual reasons are a step with no fields on it, a missing terms and conditions section, more signatures or guarantees marked required than the number you show, a reference, contact or location list with no rows in it, and a condition that points at a field or an answer you have since removed. Fix the problem and press Publish again.
Throw a draft away
- Click Discard in the top bar if you want to abandon everything you have changed since the last publish.
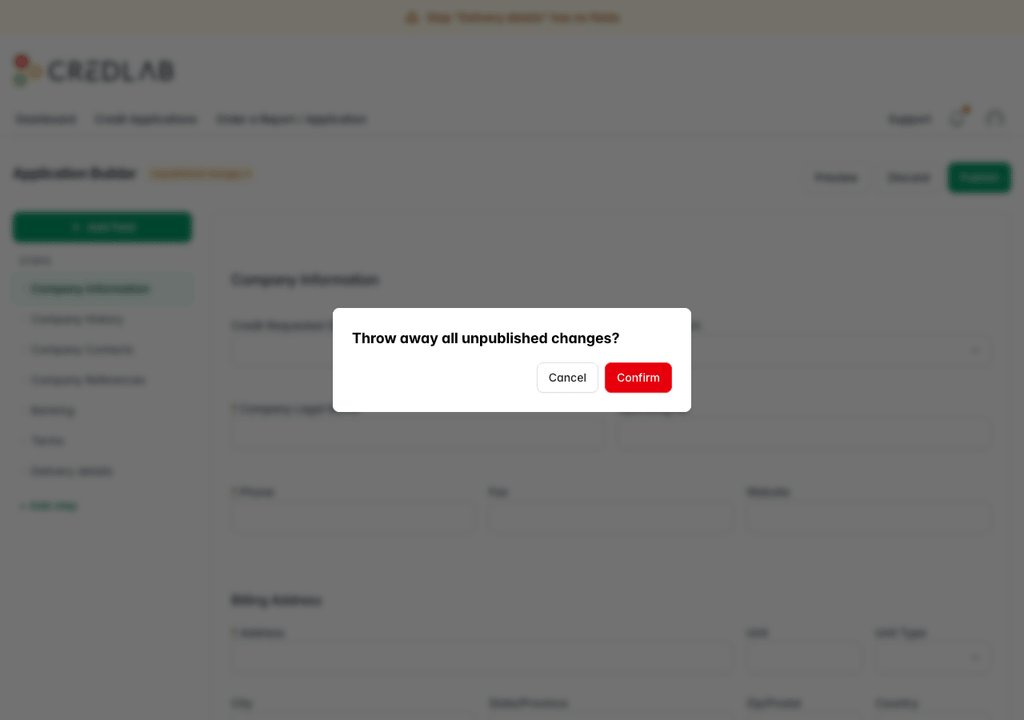
A confirmation box over the builder asking whether to throw away all unpublished changes, with Cancel and Confirm buttons. - Click Confirm. Your draft is deleted and the builder goes back to showing your live form. This cannot be undone, so use Preview first if you are unsure.
Tips & notes
- Nothing is live until you publish. You can leave a half finished draft for days and come back to it. The Unpublished changes badge is your reminder that one is waiting.
- Two people editing at once will tread on each other. Whoever saves second gets rejected, and the builder reloads to show the version the first person just saved. Agree who is doing the work before you start.
- A field can only be on your form once. Drawer entries already in use are greyed out and marked on form.
- Removing a field does not delete the answers you already hold. Applications submitted before the change keep what was collected. It just stops being asked for.
- A field another field depends on cannot be removed until you change the condition that points at it. Credlab tells you which field is in the way.
- Renaming or reordering the options in a drop down is safe. Answers already submitted stay tied to the option they were given, so your reports do not shift under you.
- Custom field answers show up on the submitted application and its PDF, under the label you gave the field. They are not part of the export field list, so if you need the answer in a spreadsheet, ask Credlab about it first.
- Logo, titles, your application link and the French option are not in the builder. They are on the Application Settings page you came in through. See "Change your application's title, subtitle and address" and "Set your application link and submission options".
- Check your blank application after a big change. The Download Blank Application (EN) button at the top of Application Settings gives you a printable copy of the published form, which is a quick way to see the result on paper. A matching (FR) button sits next to it if your form offers French.
Related articles
- Add conditional rules to your form
- Configure bank verification on your form
- Share your application link and receive applications
- Change your application's title, subtitle and address
- Set up your terms, signatures and personal guarantee
- Set up references, locations and contacts on your form
- Set your application link and submission options