Once the decision is on the file, the credit outcome email is how the applicant hears it. You do not write it from scratch: Credlab picks the template that matches the approval status you recorded, fills in the applicant, the limit, the account number and the account manager, and addresses it to the people already on the file. Your job is to read it, change anything that needs changing, attach whatever should travel with it, and send. Every send stays on the file afterwards with a delivery status for each address, so you can see who actually received it.
Before you start
- Sending needs the Can send credit outcome notifier permission, or you need to be an account admin. Without one of the two, the Credit Outcome Notifications card is not on the file at all.
- Record the decision first. The Approval status on the Private notes and options card chooses the template, and the approval amount, the account number and the account manager fill in the blanks in it. See "Record the decision and assign your team".
- Approved, Denied, Pending, Withdrawn and COD each have their own template. Flagged has none, and neither does a file with no status yet, so the composer opens with an empty message for you to write.
- The wording of the templates is set up once for the whole account by an account admin. See "Set up credit outcome email templates".
- There is no draft and no second confirmation. What is in the composer when you press the button is what the applicant gets, and it cannot be unsent.
Send the decision to the applicant
- Open the credit file and scroll the right hand column down to Credit Outcome Notifications.
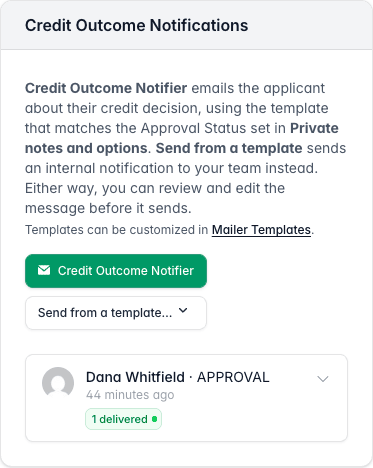
The Credit Outcome Notifications card on a file, with the Credit Outcome Notifier button and one earlier email marked one delivered. - Click Credit Outcome Notifier. The composer opens over the file with the email already written.
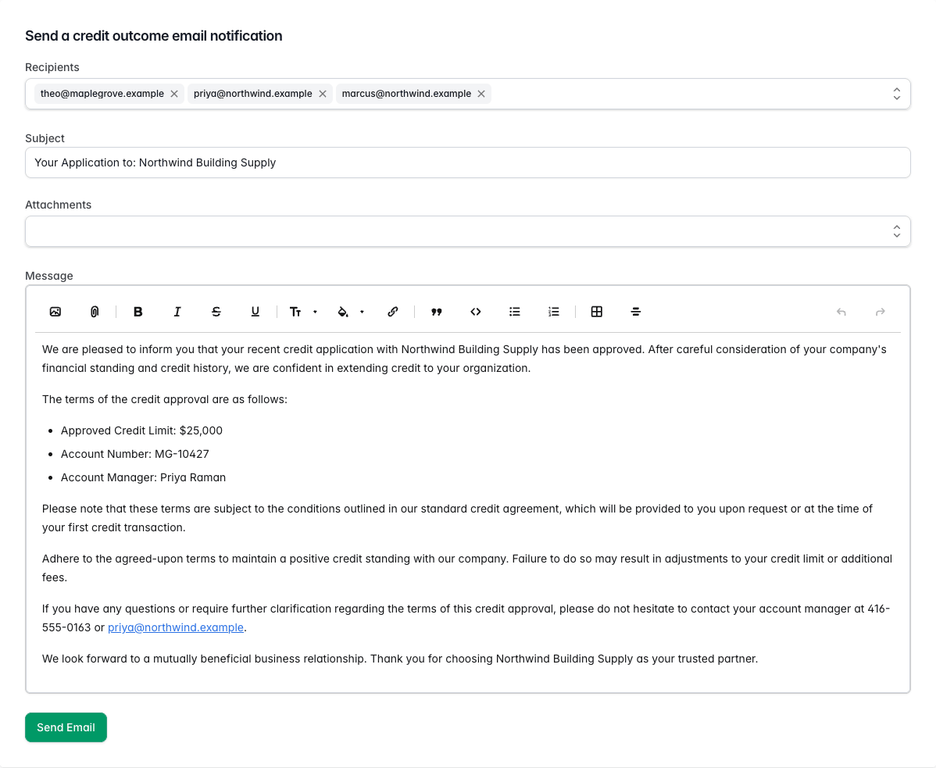
The composer for an approved file, showing three recipients, a subject, an empty attachments box and the approval message.
Subject is the subject line from your account's template for this status, or Your Application to: followed by your company name when nobody has set one.
Message is the template for this status with the file's own details written in. In the approval template above, the credit limit, the account number and the account manager's name, phone number and email address all came off the file. Most details the file has no value for are left standing as a bracketed placeholder, for example [Account Number] on a file where you have not opened an account number yet; an email address the file lacks simply comes out blank. Fill the field in on the file and open the composer again, or simply edit the sentence before you send.
- Click the Recipients box to see everybody Credlab can address the email to.
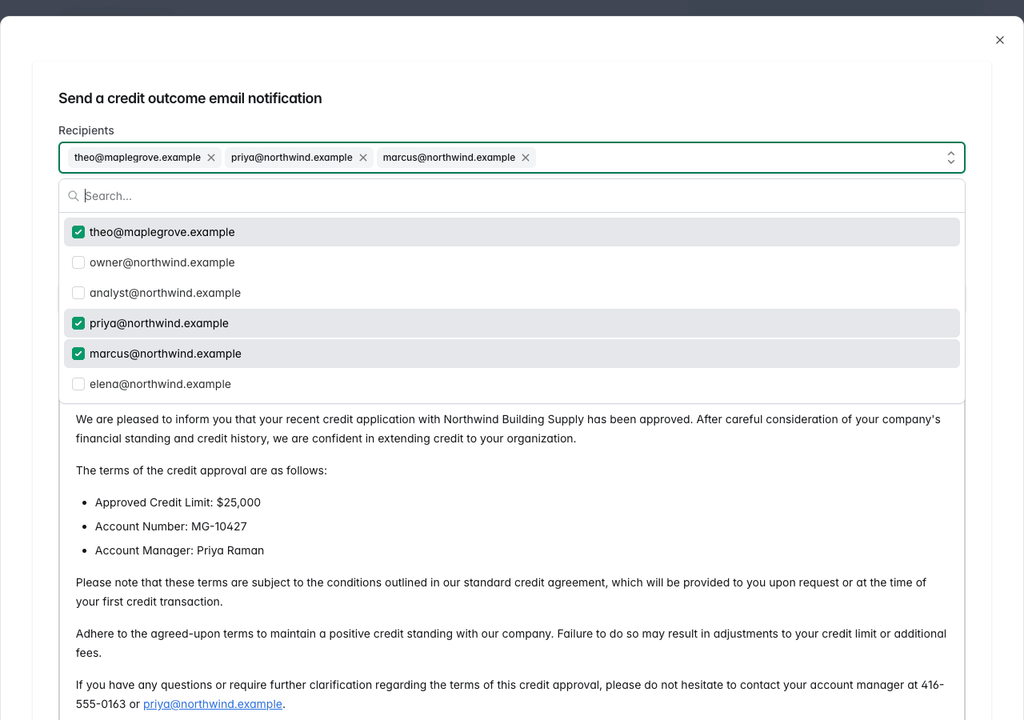
The recipients list open, offering the applicant contact, the users on the account and the staff, with three already ticked.
Credlab addresses the email to the people the decision concerns: the applicant's signers, anyone who signed a personal guarantee, the account manager on the file, and the first person on the file for each staff type that is set to receive outcome emails. Out of the box that means Inside Sales and Outside Sales, which is why a colleague's address can sit beside the applicant's. Choosing which types are included is covered in "Manage staff types".
The open list is wider than that. It also holds everybody on your Credlab account and all of your staff, so you can add a colleague for this one email. Tick a line to add it, click the small x on an address to take it off, and if the person you need is nowhere on the list, type their address in the search box and click the Add line that appears.
- Click the Attachments box to see what can travel with the email.
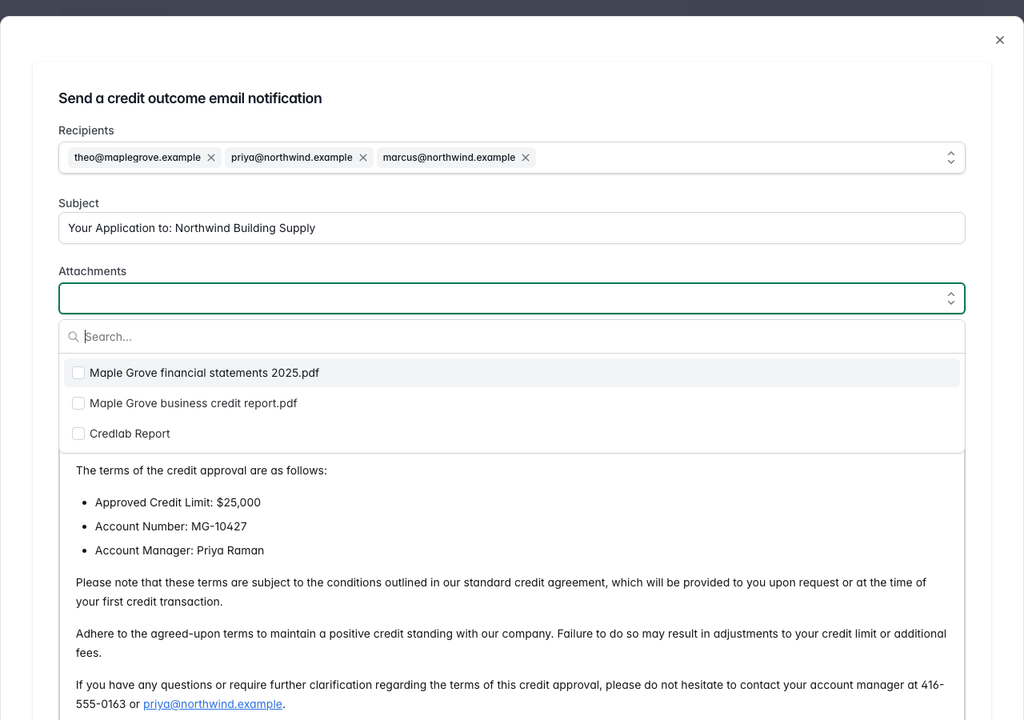
The attachments list open, offering two documents from the file and the Credlab Report.
The list holds the documents on the file, the Signed Credit Application once a signature request exists on the file (if nobody has signed yet, nothing is attached for it, so check the signature status first), and the Credlab Report if you are allowed to see reports. A document with Internal use only switched on is never offered, and neither is one in a file format email providers tend to block, so a document you expected to see and cannot is usually one of those two.
- Click each item you want to send.

Two attachments chosen, each showing its size, with the total attachment size printed underneath.
Every attachment shows its size, and the total is added up under the box. Over 10 MB Credlab warns you that some providers may refuse the email, and over 25 MB it warns you that most will. The Credlab Report is built fresh when the email goes out, so its size is an estimate.
- Read the message through and edit anything you want to say differently. The box is a normal editor, so you can add a paragraph, a list or a link. Editing here changes this email only and never touches the template.
- Click Send Email. The composer closes and the email joins the list on the card.
Tell your own team instead
The same card can send an internal note about the file to your own people rather than to the applicant, using templates written for that purpose. The Send from a template... button appears only when your account has some.
- Click Send from a template... and pick the one you want.
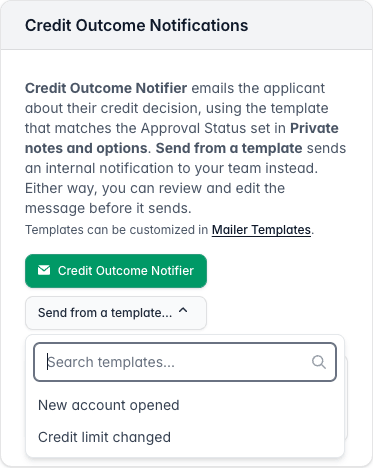
The Send from a template button open on the card, with a search box and two internal templates listed. - Wait for the composer to open, filled from that template.
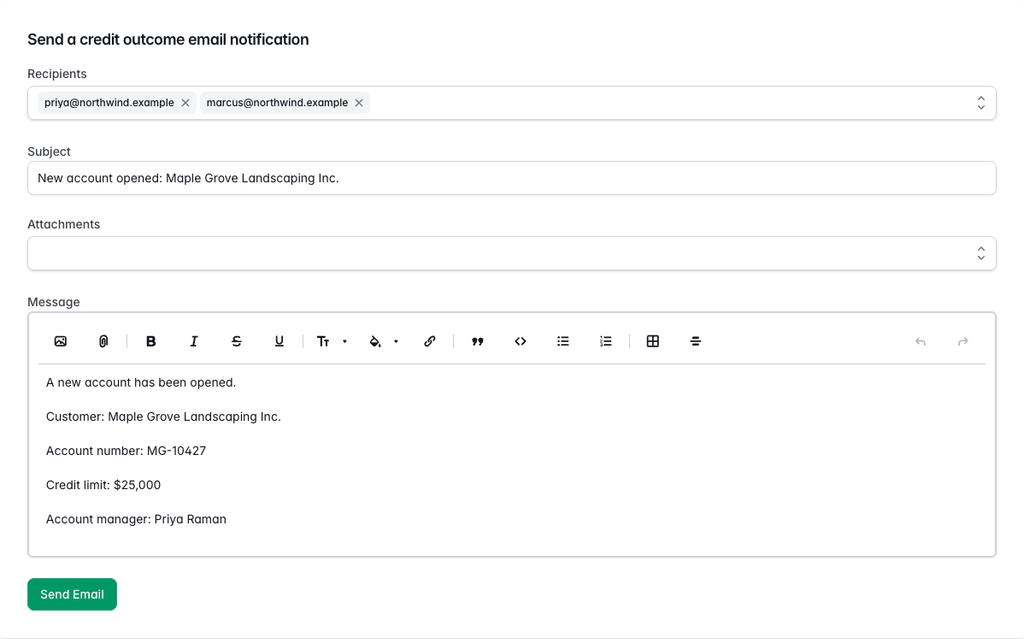
The composer filled from an internal template, addressed to two colleagues, with a short note naming the customer, the account number and the limit.
The only real difference is who it starts out addressed to: the staff on the file and the account manager, rather than the applicant. Each template decides which of those two it includes. Everything else behaves the same, so you can still add addresses, add attachments and edit the message before sending.
See who received it
Every email sent from this card is kept on the file underneath the buttons, oldest first, with who sent it, what kind of email it was and how long ago it went.
- Click a row to open it.
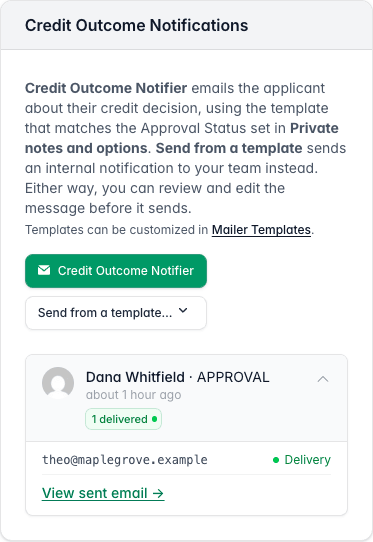
An earlier outcome email expanded, showing the applicant address with a green Delivery status and a link to view the sent email.
Each address is listed with where it got to. A row starts as Queued, moves to Injection when the mail service accepts it and to Delivery when it reaches the mailbox, and shows Bounce or Spam in red when it does not. If the email could not be sent at all, for example because an address was invalid or blocked, or an attachment could not be read, the addresses are marked Failed with the reason beside them. The coloured badges on the closed row count the same thing, so 1 delivered tells you the email landed without opening the row.
View sent email opens exactly what went out, with the list of addresses it was sent to. It is the record of what you told the applicant, so it is worth checking before you answer any question about what they were promised.
Tips & notes
- Nothing is sent automatically. Recording a decision does not notify anybody. The applicant hears nothing until somebody opens this card and sends the email.
- Replies come to you. The email is sent with your own address as the reply address, so the applicant's answer arrives in your inbox rather than somewhere central.
- You can send more than once. A corrected limit, a second contact who needs to know, a follow up: each send is a new entry in the list, and the earlier ones stay where they are.
- Check the status before you open the composer. The template is chosen when the composer opens. If you change the approval status afterwards, close the composer and open it again so it picks up the right one.
- A queued email is not a delivered email. If something important hinges on the applicant having been told, open the row and look for Delivery rather than trusting that the send worked.
- Wrong wording every time is a template problem. If you find yourself editing the same sentence on every file, ask an account admin to change the template instead. See "Set up credit outcome email templates".
Related articles
- Record the decision and assign your team
- Set up credit outcome email templates
- Manage staff types
- Request documents and manage a file's attachments