Everything your team decides about a credit file is recorded in one place: the Private notes and options card, in the left hand column of the file. It is where you say who is working on the file, what you decided and for how much, who the account manager is, what account number you opened, and anything your colleagues need to know. None of it is visible to the applicant. It is also the card the rest of Credlab reads from, so what you put here decides how the file is filtered on the applications list, whether it still counts as waiting on a decision, and which template and recipients the credit outcome email starts with.
Before you start
- You need permission to change this card. Account admins have it, and so does anyone given the Can modify private notes section role. Everybody else on your account sees the same card with every box greyed out, so they can read the decision and the notes but cannot change them.
- Every box on this card saves the moment you change it. There is no Save button for the decision, the assignments or the staff rows, and a small Saved! message in the top right corner is your confirmation. Additional Notes is the one exception, covered below.
- Nothing on this card reaches the applicant on its own. The decision and the amount are only sent out when you send the credit outcome email yourself, which is a separate step.
Find the options card
- Open the credit file you are working on. If you are not sure where it is, see "Find and open a credit file".
- Scroll the left hand column down to Private notes and options.
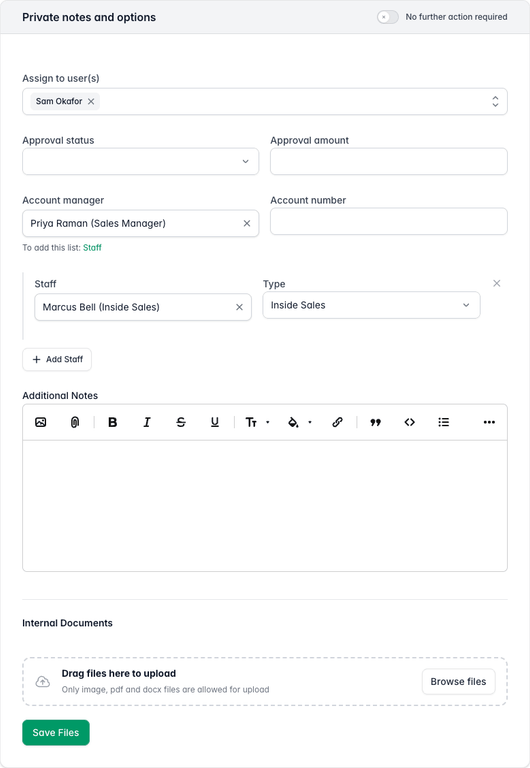
The Private notes and options card showing the assignment, approval, account manager, staff, notes and internal document fields.
The card is one long form, top to bottom: who the file is assigned to, the decision, the account manager and account number, the staff on the file, your notes, and a place for internal documents. The switch in the card header, No further action required, is covered at the end of this article.
Assign the file to someone on your team
- Click the Assign to user(s) box.
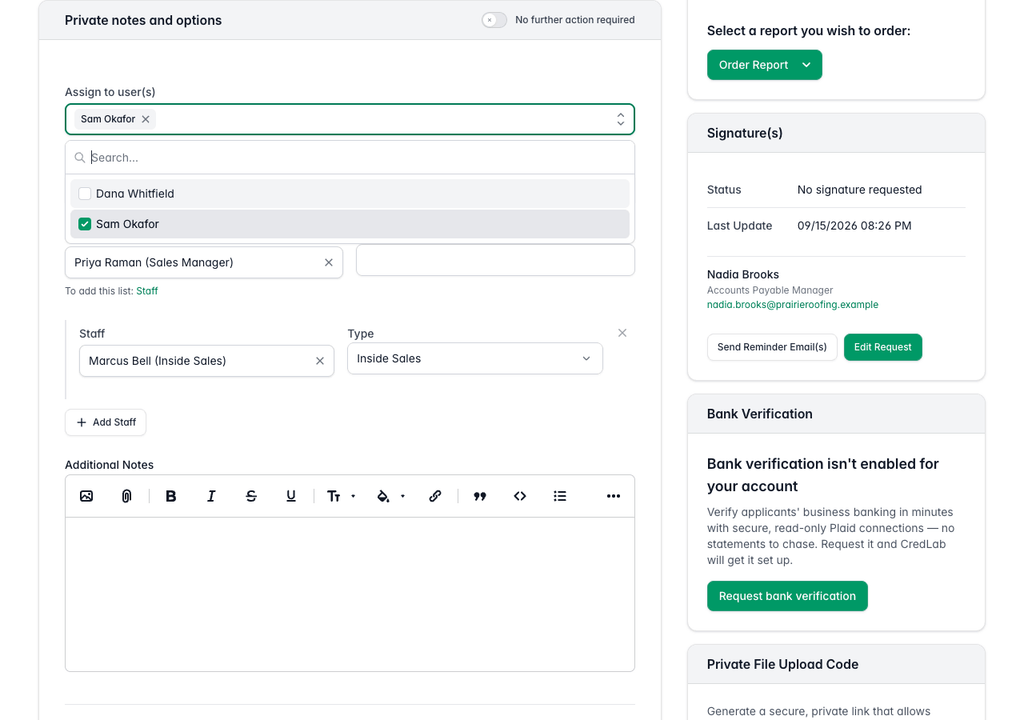
The assignment box open with a search field and a checkbox beside each user on the account, one already ticked. - Click a name to tick it.
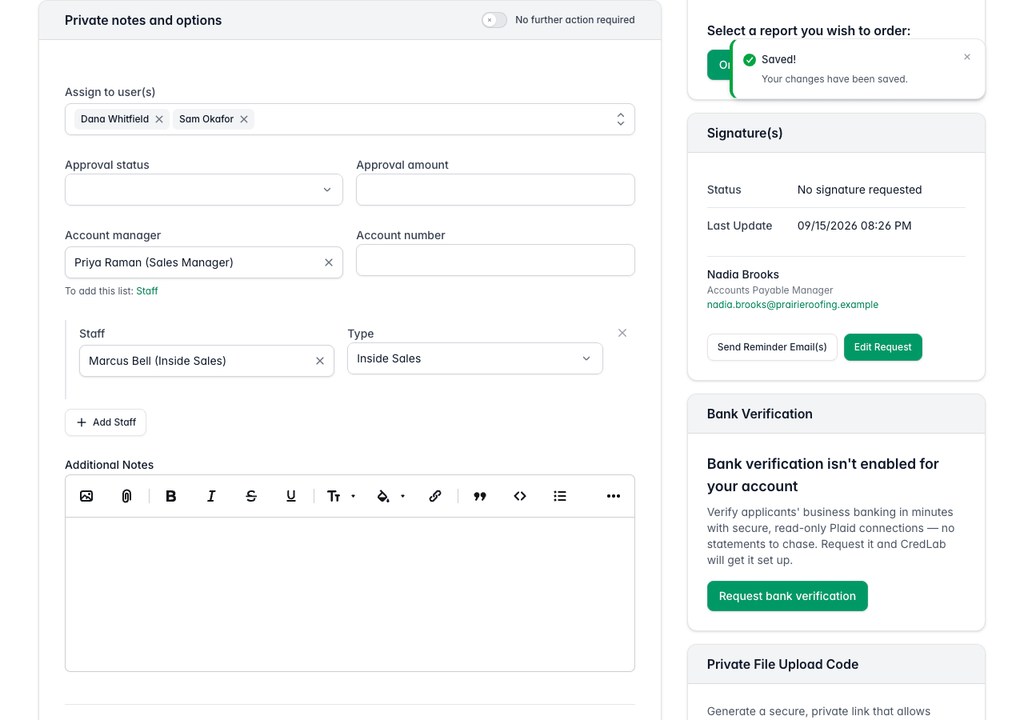
Two names now sit in the assignment box and a green Saved message confirms the change was stored.
The list holds everybody on your account, and you can tick as many people as you need. Type in the search box to narrow a long list down. Each name you tick appears as a chip in the box and the file saves straight away. To take somebody off the file, click the small x on their chip.
Adding somebody emails them. They get a message from Credlab with the subject Your company name - Application Assigned to You, the applicant's name and address, and a View Application button that opens this file. Only people you have just added are emailed, so ticking a third name later does not email the first two again, and removing somebody sends nothing at all. If you assign a file to yourself, you get the email too.
Anyone who would rather not receive these can switch off Receive application assigned emails in their own profile. They stay assigned, the file still shows up when the list is filtered by their name, and they still get the in-app notification in the bell menu.
Record the decision
- Choose your decision in Approval status.

The Approval status box set to Approved with a credit limit typed into the Approval amount box beside it.
There are six to choose from, and you can go back to a blank status at any time:
- Pending. You have looked at the file and are not finished with it.
- Approved. You are opening an account.
- Denied. You are not opening an account.
- Flagged. Something on this file needs a second pair of eyes.
- Withdrawn. The applicant is no longer asking.
- COD. No credit terms, cash on delivery instead.
Approval amount beside it is a plain text box, so write the limit however your team writes it, for example $40,000. Type it and click outside the box to save.
Recording the decision changes three things elsewhere:
- The file drops off the Waiting on decision tile on your dashboard, which counts only the files with no approval status at all.
- The Approval filter on the applications list can now find it. That filter offers No Decision Set, Approved, Pending, Denied and Flagged, so files you mark Withdrawn or COD show under that filter's All option or by searching, not under a status of their own.
- The credit outcome email picks its template from the status, and starts with the amount you typed. Approved, Denied, Pending, Withdrawn and COD each have their own template. Flagged has none, so an outcome email started from a flagged file opens with an empty message for you to write yourself.
The date you first set Approved, Denied or Withdrawn is kept with the file as well. It is not shown on screen, but it is available as Approval Decided At when you build an export.
Name the account manager and the account number
- Choose a name in Account manager.

The Account manager box holding a named sales manager and the Account number box holding the number opened for the customer.
The names in this list are your staff, not your Credlab users, and the Staff link under the box takes you to the page where you add them. See "Add staff and assign them to credit files".
The account manager matters beyond the record: they are added to the recipients of the credit outcome email by default, and the applications list can be filtered by account manager.
Account number beside it is a free text box for the number you opened in your own accounting system. Type it and click outside the box to save it.
Add the rest of the team with Staff and Type
A file can carry more than one of your people. Each row pairs a person with the part they play.
- Click Add Staff to get an empty row.
- Choose a person in the row's Staff box.
- Choose the part they play in the row's Type box.
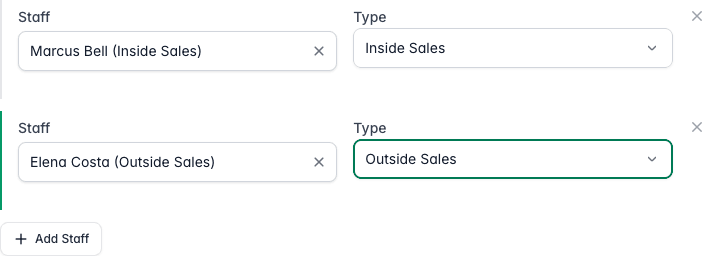
Two staff rows on the file, one for inside sales and one for outside sales, with an Add Staff button underneath.
A row is only saved once both boxes are filled, so a Not saved message after the first of the two choices is expected. Make the second choice and it saves. To take a row off the file, click the x at its top right and confirm.
The types come from your own list, which starts with Sales Manager, Inside Sales, Outside Sales and Other. Types matter because each one can be marked to receive the credit outcome email. Out of the box, Inside Sales and Outside Sales are, and Sales Manager and Other are not, so a file with an inside sales rep on it starts the outcome email with that rep already in the recipients. Only the first person of each type is added automatically, so if two people share a type, add the second one to the email by hand. Adding the same person twice under the same type is refused with an Already assigned message.
Leave notes for your team
Additional Notes is a rich text box for anything that does not fit in a field: what the customer said on the phone, why you set the limit where you did, what to check next time. It is the one part of the card that does not save as you type.
- Type your note in the Additional Notes box.
- Click Save Files at the bottom of the card. Changing any other box on the card also saves the note, but do one or the other before you leave the page.
Below the notes, Internal Documents is for files that stay inside your team. Adding documents to a credit file is covered in "Request documents and manage a file's attachments".
Mark a file as needing nothing more
The No further action required switch in the card header is how you park a file you are finished with, without archiving it.
- Click the switch in the card header.
The file stays exactly where it is and keeps everything on it. What changes is the applications list: turning on the Action Required switch there hides every file marked this way, which leaves you looking at only the files that still need somebody to do something.
Tips & notes
- Working the list from these fields. The applications list can be filtered by Assigned to User, by Account Manager, by Approval, and by the Action Required switch, all at once. Set them the way you like and the list is your own work queue.
- Decision information on the list. Your account has a setting called Show decision information in credit applications index. With it on, every row on the applications list also shows the account manager, the approval amount, the approval status and the account number, so you can read the decisions without opening each file.
- Emails only from your own files. Somebody who works a defined set of files can switch on Only receive emails from assigned applications in their profile. After that Credlab only emails them about files they are assigned to, which makes the assignment box on this card the thing that controls their inbox.
- Your own fields. If your account has custom internal fields, they appear on this card between the account number and the staff rows, and they save on change like everything else. Setting them up is covered in "Add custom fields to Private notes and options".
- A blank status is not a decision. A file with no approval status counts as waiting on a decision forever. If a file is finished but does not deserve an approval, Withdrawn or Denied says so properly, and the dashboard tile stops counting it.
- Read only is still useful. Colleagues without the editing permission can open the file and read the decision, the amount, the assignments and your notes. If somebody needs to change those, an account admin can give them the Can modify private notes section role.
Related articles
- Find and open a credit file
- Send the credit outcome email
- Request documents and manage a file's attachments
- Add staff and assign them to credit files
- Add custom fields to Private notes and options