Sooner or later you need something the application form did not ask for: a financial statement, a tax form, a copy of a licence, a signed guarantee. You do not have to collect it by email and then keep track of the attachment yourself. Every credit file can hand out an upload address and a six character code. The applicant goes to the address, types the code, and drops the files in. They land on the file, next to everything else you hold on that applicant. This article covers generating the code, sending it out, what the applicant sees, what happens when files arrive, and adding documents of your own.
Before you start
- Generating a code needs the same permission as the rest of the private notes section: you are an account admin, or your user has Can modify private notes section switched on. Without it you can still read and copy a code that is already live, but there is no button to make one. The card tells you so.
- A code lasts 30 days. If the applicant uses it in the last week of its life it renews itself for another 30 days.
- Credlab does not email the code for you. You send it, in your own email or over the phone.
- Uploaded files go onto the credit file, not to your inbox. If you want an email when they arrive, see the tips at the end.
Generate an upload link and code
- Open the credit file you want the documents for. If you are not sure where it is, see "Find and open a credit file".
- Scroll the right hand column down to the Private File Upload Code card.
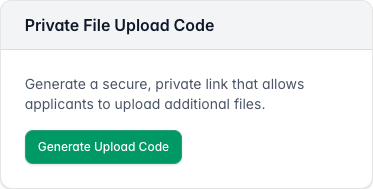
The Private File Upload Code card on a credit file, showing a short explanation and a green Generate Upload Code button. - Click Generate Upload Code. The card fills in with a green Active badge, the date the code stops working, the upload address, and the code itself.
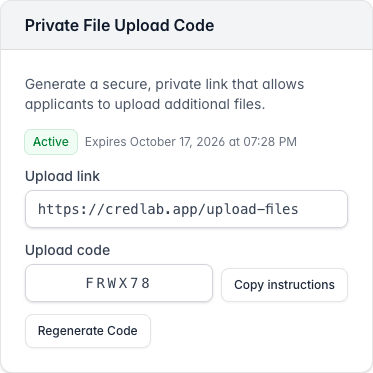
The same card after generating, showing an Active badge, an expiry date, the upload link, a six character code, Copy instructions and Regenerate Code. - Click Copy instructions. That puts the whole thing on your clipboard: the address, the code, and a line telling the applicant they will be asked for the code. Paste it into your email to them.
The address is the same for every applicant and every file. The code is the part that matters: it is what points at this file, and it is what you must get to the right person. Codes are six characters, four letters and two numbers, and they never contain the letter O or the digit zero, so they can be read out over the phone without anyone guessing wrong.
What your applicant sees
Nothing here needs a password or an account, and there is nothing to install.
- The applicant goes to https://credlab.app/upload-files and types the six character code into the box.
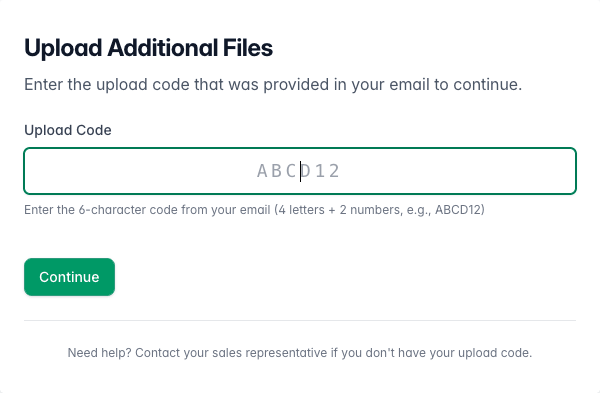
The Upload Additional Files page asking for the upload code, with a six character field, a Continue button and a line offering help. - The applicant clicks Continue and the upload page opens. The allowed file types are listed at the bottom.
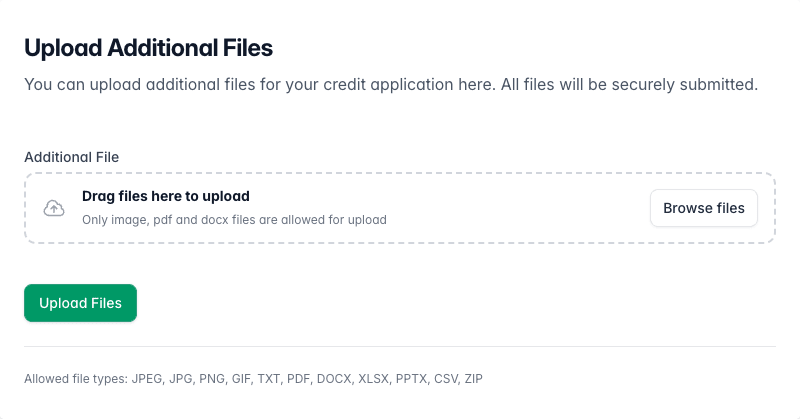
The applicant's upload page with a dashed box reading Drag files here to upload, a Browse files button, and an Upload Files button below it. - The applicant drags a file onto the box, or clicks Browse files and picks one. The file appears in the box with its size and a Remove file link in case it was the wrong one.
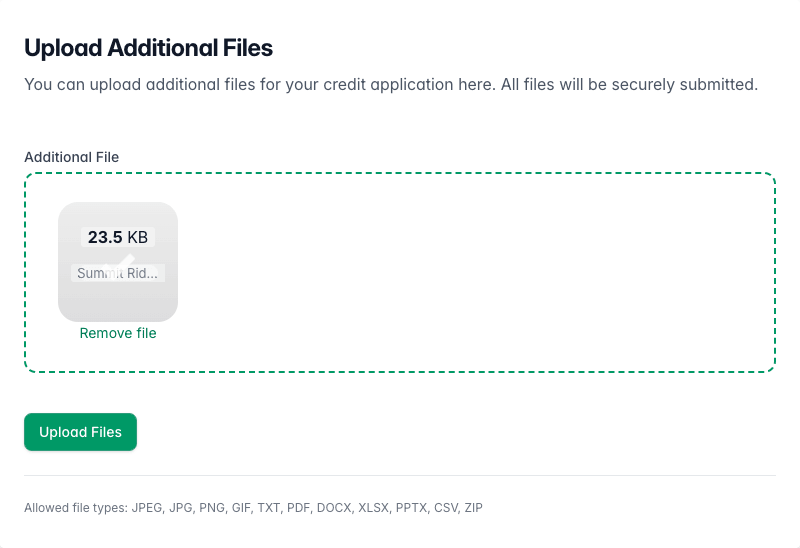
The chosen file sits in the dashed box as a tile showing its size, with a Remove file link underneath and the Upload Files button below. - The applicant clicks Upload Files and lands on a confirmation page listing what was sent. Upload More Files goes back for another round, and the same code works as often as they need it until it expires.
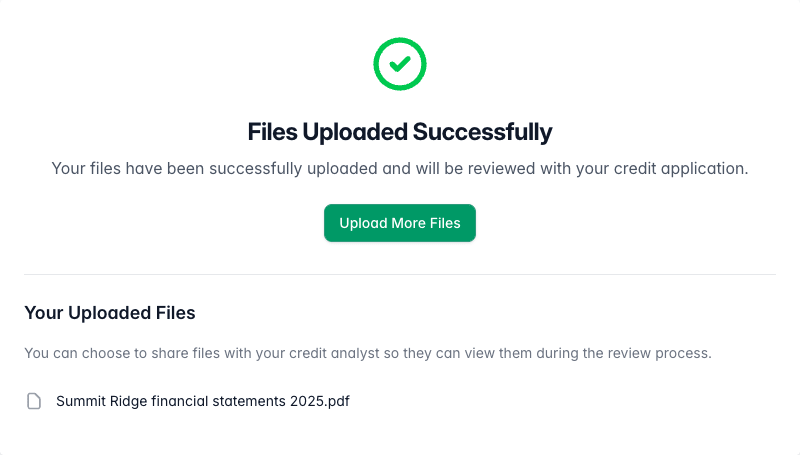
The confirmation page reading Files Uploaded Successfully, with an Upload More Files button and Your Uploaded Files listing the statement just sent.
When the files arrive
- Open the credit file and scroll to Internal Documents, at the bottom of the Private notes and options card. Everything that came in through the upload code is listed there.
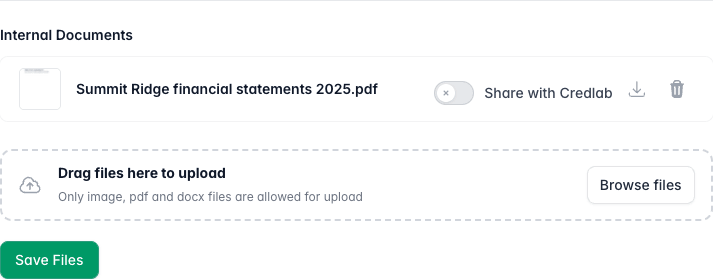
The Internal Documents section listing the applicant's uploaded statement with a Share with Credlab switch turned off, a download icon and a remove icon. - Click the file name to read it. PDFs and images open in a preview window over the file, and anything else opens in a new tab.
- Click the download arrow to save a copy, or the trash icon to get rid of it. Removing asks you to confirm, then hides the row; it is gone for good once you click Save Files.
If you are assigned to the file, you also get an email naming the files and a notification in the bell menu naming the applicant.
Add a document of your own
The same list holds anything you want to keep with the file: a credit committee note, a guarantee, a copy of correspondence.
- Open the file and scroll to Internal Documents in the Private notes and options card.
- Drag the file onto Drag files here to upload, or click Browse files and choose it.
- Click Save Files. The document joins the list with the same download and remove buttons as everything else.
- Switch Share with Credlab on if you want Credlab's analysts to see the document while they work on your report, then click Save Files again.
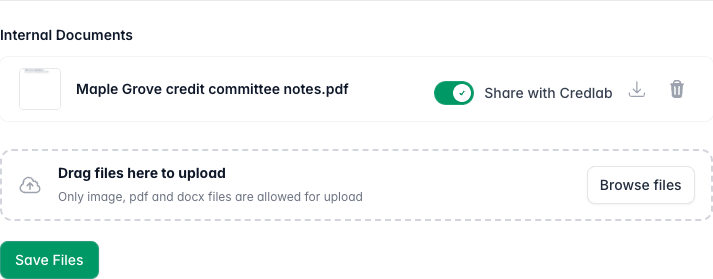
The same section after adding your own document and switching Share with Credlab on, so the switch beside the file name shows green.
Documents on this list stay inside your team until that switch is on. Turning it on for a bank statement or a set of financials is often the fastest way to get a better report, because it saves Credlab asking for the same paperwork a second time.
Where the file's other documents live
Internal Documents holds what came in through the upload code and what you added yourself. The Reports/Documents card in the right hand column holds the rest: the submitted application, the signed copy once the applicant has signed it, your Credlab report, and any files the applicant attached on the application form itself. Ordering and reading reports is covered in "Order a business credit report"; getting the application signed is covered in "Send the application for e-signature".
Tips & notes
- Allowed file types are JPEG, JPG, PNG, GIF, TXT, PDF, DOCX, XLSX, PPTX, CSV and ZIP. Anything else is refused, and the applicant is shown the list. A photo of a document taken on a phone is fine.
- Treat the code like a key. It is not tied to the applicant's email address, so anyone holding it can upload to that file, and the confirmation page shows them the names of the documents already on the Internal Documents list. Send it to your contact, not to a shared mailbox nobody owns, and bear it in mind when you name an internal document.
- Wrong code, wrong person, or no reply. Click Regenerate Code to issue a new code and kill the old one. It asks you to confirm first, because anyone still holding the old code, including the applicant, is locked out from that moment.
- Too many attempts. The code page limits how many tries it accepts from the same connection over a few minutes, counting every attempt, not only wrong ones, and then asks the applicant to wait. If they keep failing, read the code out to them rather than sending it again.
- Expired codes tell the applicant to contact support. If they do come back to you, generate a fresh code and send it: that is quicker than anything else.
- Sharing is off by default unless an account admin has ticked "Share uploaded documents with CredLab by default" in your account settings, in which case every new upload starts shared.
- Notification emails go to the users assigned to the file, and only when Receive file upload notifications is on in their profile. If files are landing and nobody notices, check both: the assignment in Assign to user(s) and the profile setting.
-
Asking for documents in the decision email. Your credit outcome templates can carry a
[File Upload Link]tag, which drops the address and a live code straight into the message and generates one if the file does not have one yet. That is the tidiest way to ask an approved applicant for the paperwork you still need.
Related articles
- Send the application for e-signature
- Find and open a credit file