Every application you receive becomes a credit file, and everything you do to that application happens inside it: ordering a report, chasing references, requesting documents, recording your decision. This article is the map. It shows you the three places a file can be found (your dashboard, the applications list, and the search box), what the status on each row means, and what you are looking at once a file is open.
Before you start
- You need to be signed in as a user on your account. Use the Dashboard and Credit Applications tabs in the top menu to move between the two screens in this article.
- Everyone on your account sees every credit file on the account. There is no view that hides other people's files from you.
- What you can do inside a file depends on the permissions an account admin gave you. If you do not have the "Can modify private notes section" permission, the Private notes and options panel is visible but greyed out, and if you do not have "Can view reports" you cannot open a finished report.
Start at your dashboard
Your dashboard is the first screen you see after signing in, and the first tab in the top menu.
- Click Dashboard in the top menu. Three count tiles sit across the top of the page.

Three dashboard tiles side by side: 1 Waiting on signature, applications pending customer signature; 4 Pending Report Level, applications without a report level selected; and 4 Waiting on decision, approval status not assigned. - Click the tile that matches what you are chasing. It opens the applications list with that filter already applied, so you land on exactly the files the number was counting.
- Scroll down to the Recent activity card on the right. It lists the newest things that happened on your account, most recent first, and each line names the applicant. Each line is a link that opens that file. Click See more activity to open the full list.
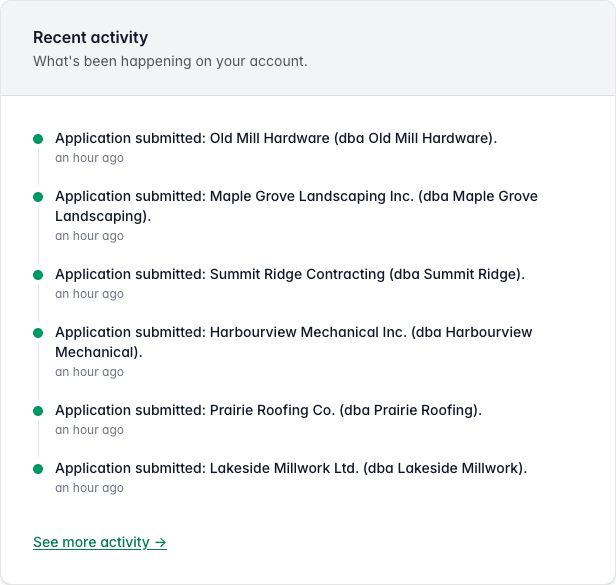
The Recent activity card listing six application submitted entries for Old Mill Hardware, Maple Grove Landscaping, Summit Ridge Contracting, Harbourview Mechanical, Prairie Roofing and Lakeside Millwork, each marked an hour ago, above a See more activity link.
This is what the three tiles count:
- Waiting on signature: files where a signature has been requested and nobody has signed yet.
- Pending Report Level: files where no report level has been chosen, which usually means nothing has been ordered on them yet.
- Waiting on decision: files where no approval status has been set, so the file is still waiting for a yes or a no from you.
None of the three counts include archived files.
Open the applications list
- Click Credit Applications in the top menu. Every file on your account is listed, newest first by the date it was submitted.
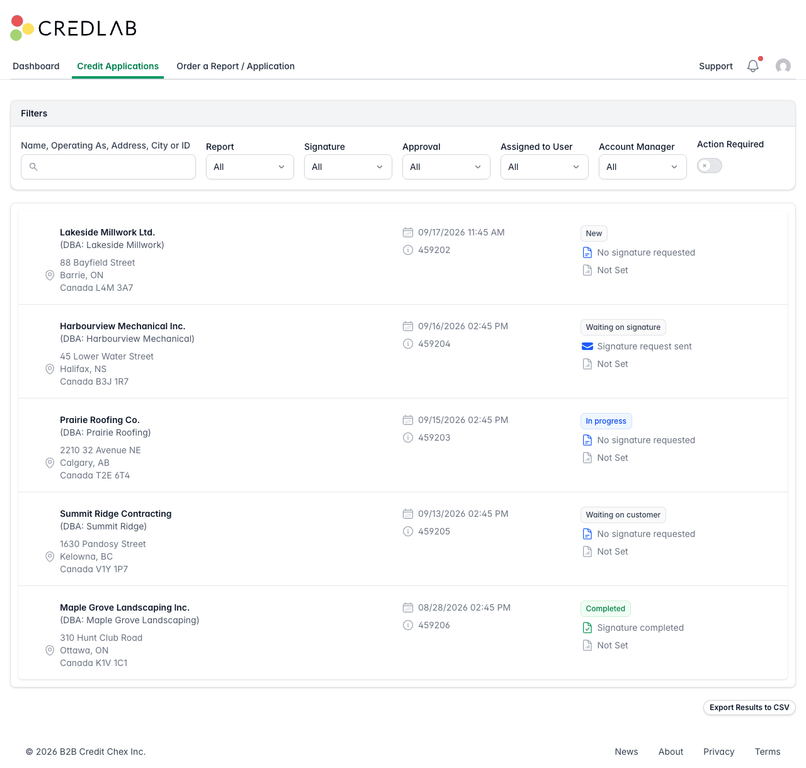
The Credit Applications list with the Filters band at the top and five rows: Lakeside Millwork marked New, Harbourview Mechanical marked Waiting on signature, Prairie Roofing marked In progress, Summit Ridge Contracting marked Waiting on customer, and Maple Grove Landscaping marked Completed, with an Export Results to CSV button below the list.
Each row shows the same four things:
- The applicant's legal name, the operating name in brackets if they gave one, and their address.
- The date and time the application was submitted, and the file's ID. That ID is the number to quote when you contact Credlab, and you can paste it straight into the search box.
- The status badge, and under it the signature status and the report level. The report level reads Not Set until a report is ordered on the file.
- A chevron on the right that appears when you hover over the row. The whole row is a link, so you can click anywhere on it.
The list is always newest first. There is nothing to click to sort it a different way, so use the search box and the filters to narrow it instead.
Search for a file
- Click into the box labelled Name, Operating As, Address, City or ID and start typing. The list narrows as you type, so there is no button to press.
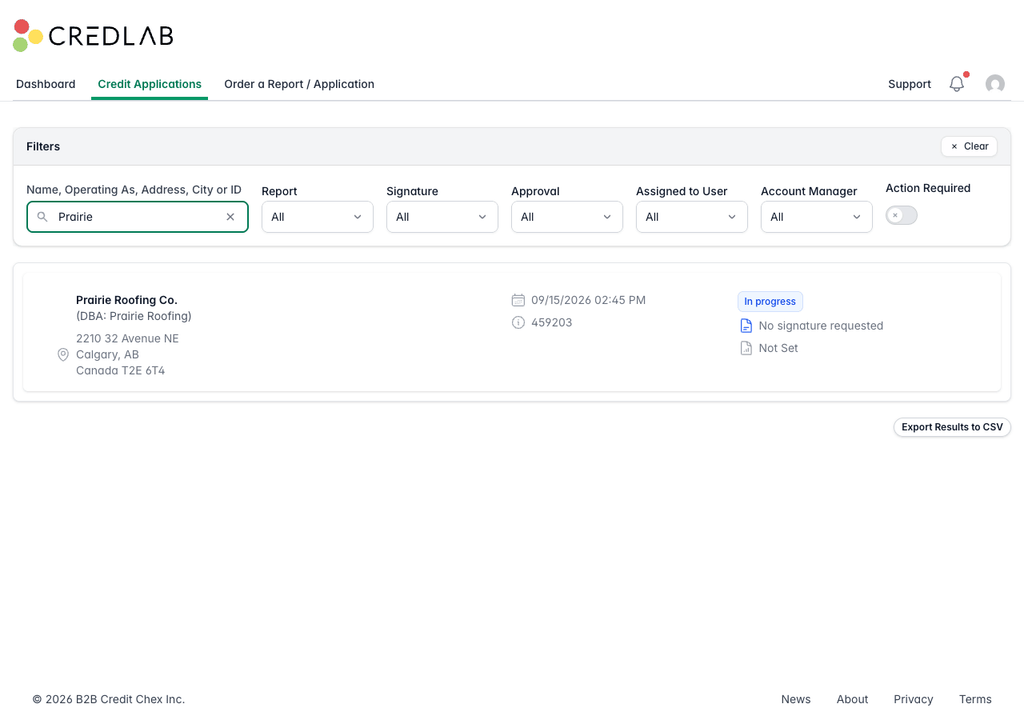
The applications list with Prairie typed into the search box and a single matching row for Prairie Roofing Co. in Calgary, plus a Clear button in the Filters band. - Search by whichever detail you have to hand. The box matches the company's legal name, its operating name, the street address, the city, the postal code, and the file ID.
- Click Clear in the Filters band to empty the search box. Clear also resets the other filters, but it leaves the Report filter as it was, so set Report back to All yourself if you want the complete list back.
Filter the list
The Filters band sits above the list. Every filter applies at once, so you can combine them, and the address in your browser updates as you go, which means you can bookmark a filtered list you use often.
- Choose an option from any of the filters. In this example the Signature filter is set to Waiting on Signature, leaving only the file whose signer has not signed yet.
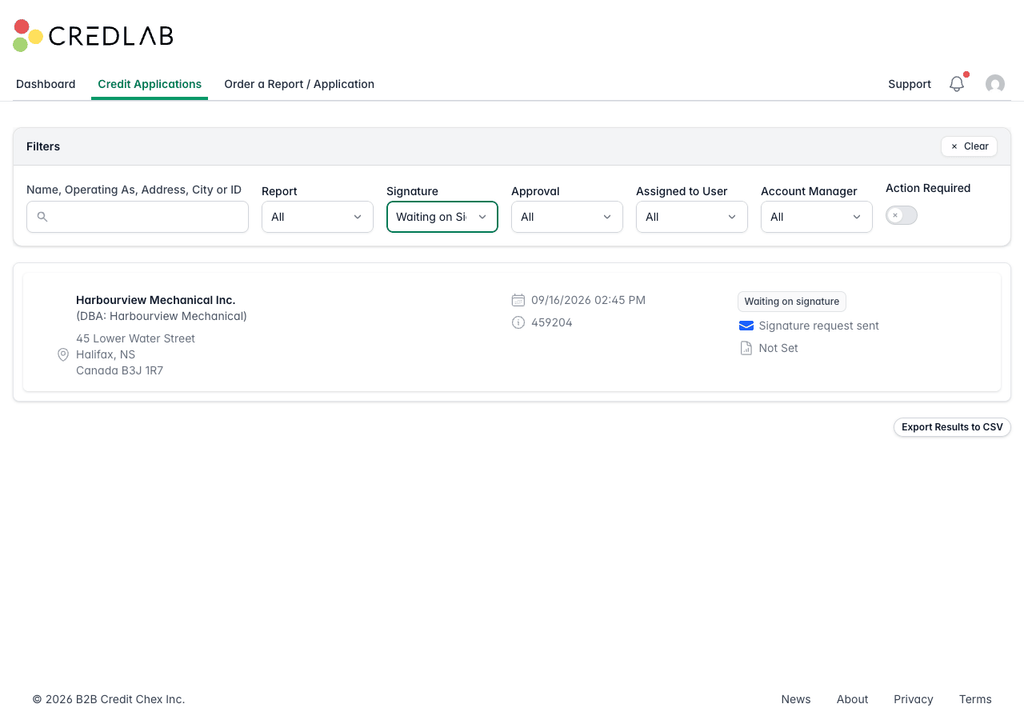
The applications list filtered by Signature set to Waiting on Signature, showing only Harbourview Mechanical Inc. with a Waiting on signature badge and a signature request sent line. - Click Clear in the Filters band to reset the search box and the other filters. It leaves the Report filter as it was, so set Report back to All yourself if you want the full list back.
This is what each filter does:
- Report narrows by where the file is in the reporting process: Report Completed, New/Report In Progress, No Report Level Set, or Archived.
- Signature narrows by the signature line on the row: Signed, Waiting on Signature, or No Signature Requested.
- Approval narrows by the decision you recorded on the file: No Decision Set, Approved, Pending, Denied, or Flagged.
- Assigned to User lists everyone on your account, so you can pick your own name to see just the files assigned to you.
- Account Manager lists the staff on your account, so you can see every file belonging to one salesperson.
- Action Required is a switch. Turn it on to hide any file that somebody has already ticked "No further action required" on.
What each status means
The badge on each row is the file's report status, and it is the same value shown as Report Status in the Status & Orders panel once the file is open. You do not set it yourself: it changes as work happens on the file.
- New: the application has arrived and nothing has been ordered on it yet. This is where every submitted application starts.
- In progress: work on the file has started, which normally means a report has been ordered.
- Waiting on signature: a signature request has gone to the person named as the signer and it has not come back signed. The line under the badge reads "Signature request sent".
- Waiting on customer: the file is waiting on the applicant, usually because they have been asked to send documents.
- Completed: the work on the file is finished and anything it produced is on the file to read.
- Archived: the file has been closed. The applications list and search do not show archived files, but one can still appear in your dashboard's Recent activity list, and clicking that line opens it like any other file.
A few other statuses, such as Reinvestigation or Order update, can also appear on a file while Credlab works on a report. They mean the same thing as In progress for your team.
The signature line under the badge and the Approval filter are separate from this status. A file can be Completed and still have no decision recorded, which is why a file can show in the Waiting on decision tile after its report is done.
Open a file
- Click anywhere on a row in the list. The file's workspace opens, and the applicant's name appears in the top menu for as long as you have the file open.
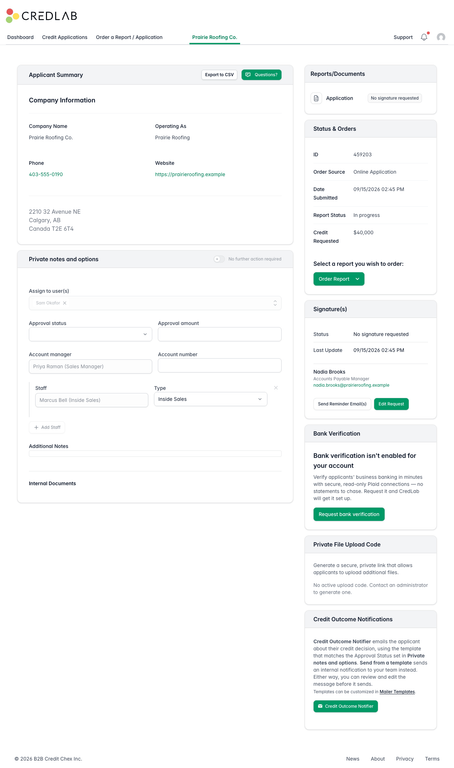
The workspace for Prairie Roofing Co. showing the Applicant Summary card with Company Information on the left above Private notes and options, and Reports slash Documents, Status and Orders, Signature, Bank Verification, Private File Upload Code and Credit Outcome Notifications cards stacked down the right side. - Read the left column first. Applicant Summary is the company as the applicant entered it: legal name, operating name, phone, website, and address. The band above it has an Export to CSV button and a Questions? button that opens a message to Credlab about this file.
- Below it, Private notes and options is your team's side of the file: who it is assigned to, the approval status and amount, the account manager, the account number, any staff attached to the file, your own notes, and internal documents. Nothing here is visible to the applicant.
- Work down the right column. Each card there is one part of the file, and each is covered by its own article.
- Click Credit Applications in the top menu to leave the file and go back to the list.
The cards in the right column are:
- Reports/Documents lists the submitted application plus every report and document on the file. Click a line to open it.
- Status & Orders holds the file's ID, where it came from, the date it was submitted, the report status, the credit the applicant asked for, and the button to order a report.
- Signature(s) shows the signature status, who was asked to sign, and the buttons to remind them or change the request.
- Bank Verification is where you ask the applicant to connect a bank account once bank verification is enabled on your account. If it is not enabled yet, the card shows a button to ask Credlab to enable it.
- Private File Upload Code is where an upload code or link for the applicant appears once one has been generated. Until then, the card tells you to contact an administrator to generate one.
- Credit Outcome Notifications is where you send the applicant your decision.
Export the list
- Scroll to the bottom of the applications list and click Export Results to CSV. The file downloads straight away.
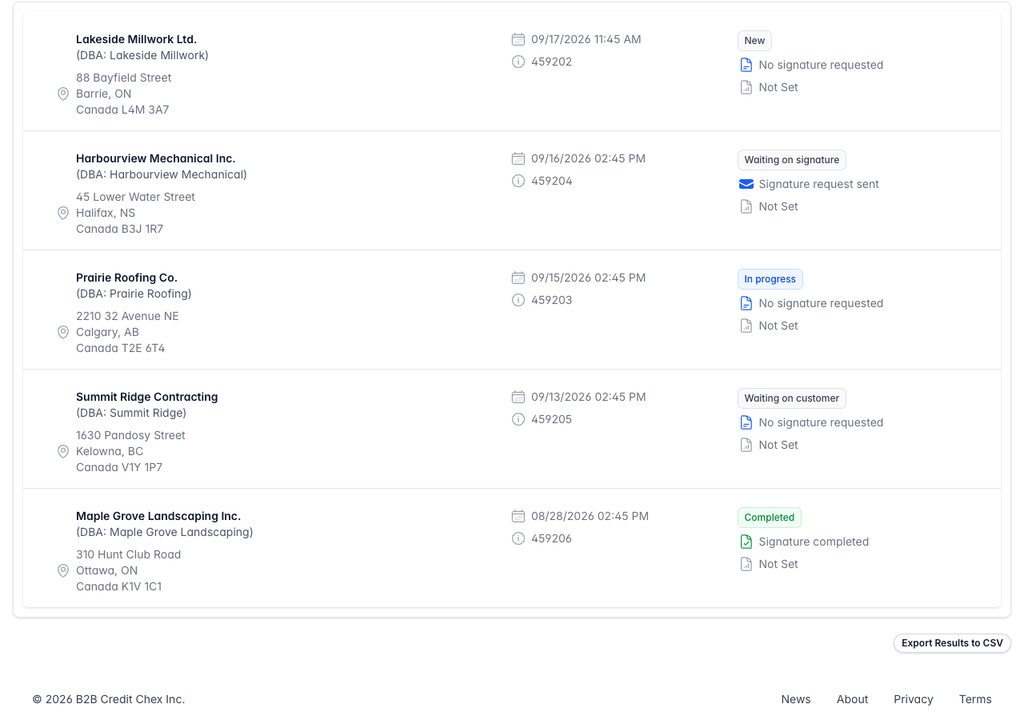
The bottom of the applications list with the five rows above and an Export Results to CSV button on the right below them. - The export always covers every file that matches your current search and filters, not only the rows on the screen. Narrow the list first, then export.
If your account has export profiles set up, this button becomes an Export Results menu with one entry per profile instead, so you can pick the layout you want. See "Create export profiles".
Tips & notes
- The applications list and search hide archived files, and choosing Archived in the Report filter still shows nothing. A recently archived file can still show up in the dashboard's Recent activity list, where clicking its line opens it. If you need an older archived file, ask Credlab.
- Every filter change updates the address in your browser, so a filtered list can be bookmarked or sent to a colleague on your account.
- The three dashboard tiles are shortcuts to the same list. Clicking one is the same as setting the matching filter yourself.
- To read the application exactly as the applicant filled it in, open the file and click Application in the Reports/Documents card. It opens in a preview window with Open in new tab and Download buttons, so it is the version to print or send on.
- The Export to CSV button in the Applicant Summary band exports that one file. The button at the bottom of the list exports every file that matches your filters.
- If a search finds nothing, check the Filters band first. A filter left on from earlier is applied at the same time as your search.
Related articles
- Share your application link and receive applications
- Record the decision and assign your team
- Create export profiles